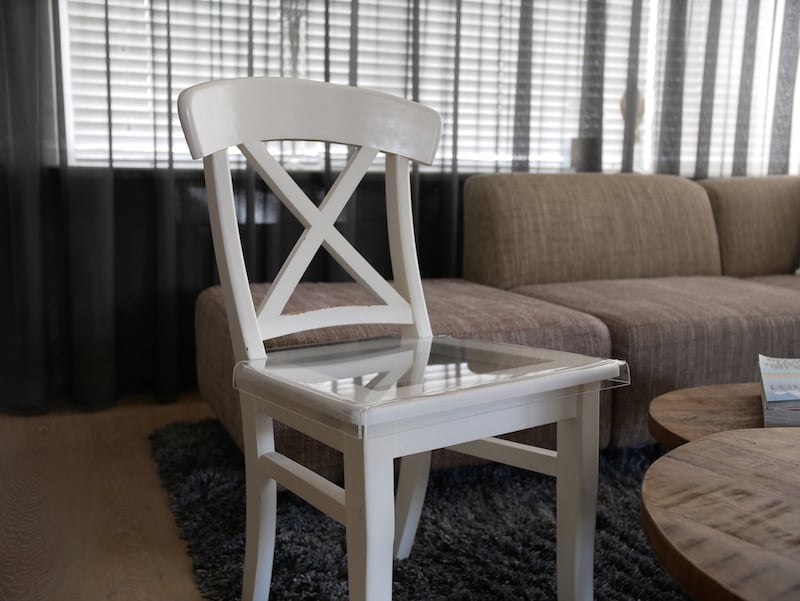
One of the hottest interior decor trends seen in recent years has been to refurbish or upcycle outdated furniture with a coat of paint and some pretty fabric. But have you ever considered using clear acrylic to give a new lease of life to a tired table or chair? Clear acrylic or Plexiglass is a very versatile material and is easy to work with – you can drill, saw, glue bend and mill acrylic sheet without any worries. In this blog post, we’re going to show you how to bring an old chair right up to date with a replacement seat made of clear acrylic.
You’ll need
Tip: Before you start working with acrylic sheet, you need to know whether it’s the cast or extruded version. Extruded or budget acrylic has high internal stress so breaks easily when being processed. For our project of making a clear acrylic chair, you’ll need a sheet of cast acrylic.
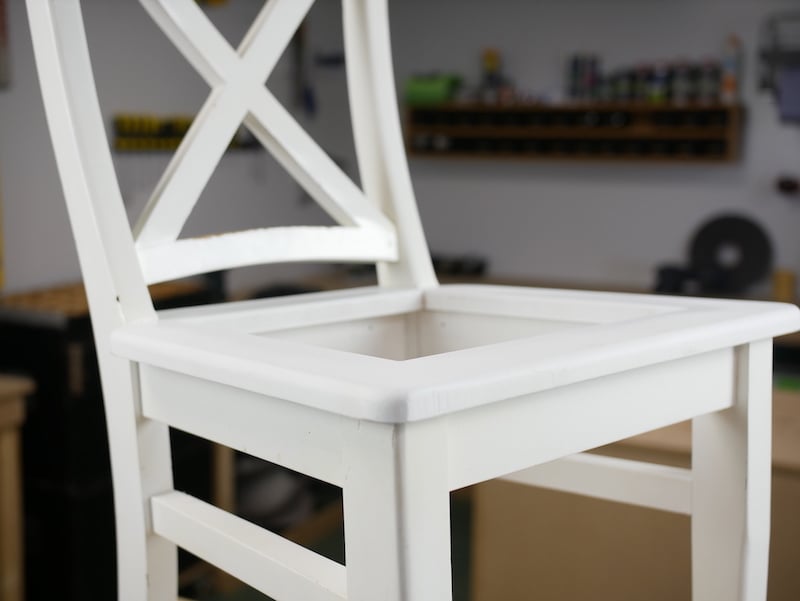
Step 1: Mark the seat
Remove the old seat form the chair and position it on the acrylic. Leave the protective film in place and stick masking tape on it to provide a surface you can draw on. Trace around the seat with a pencil. Add two side wings about 5cm wide to your outline in the middle of each side. These wings will later be bent around the chair frame to secure the seat. Once you’re happy with the shape of the seat and the side wings, it’s time to start cutting the acrylic sheet.
>h2>Step 2: Cutting the acrylic sheet
Secure the sheet with clamps and use a jigsaw with a fine-tooth saw blade to cut the acrylic chair seat. Wear safety goggles to protect your eyes from any splinters of acrylic. For a standard 300 mm saw blade set the speed to 4000 revs per minute. Carefully cut along the marked line around the entire shape. Sand any rough or sharp edges until they’re completely smooth. For more information and tips about sawing acrylic, view our blog about sawing acrylic.
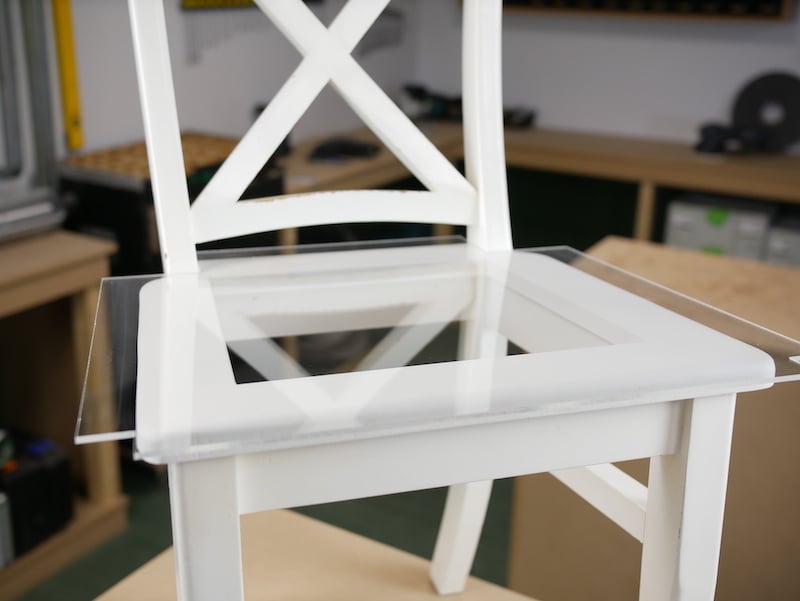
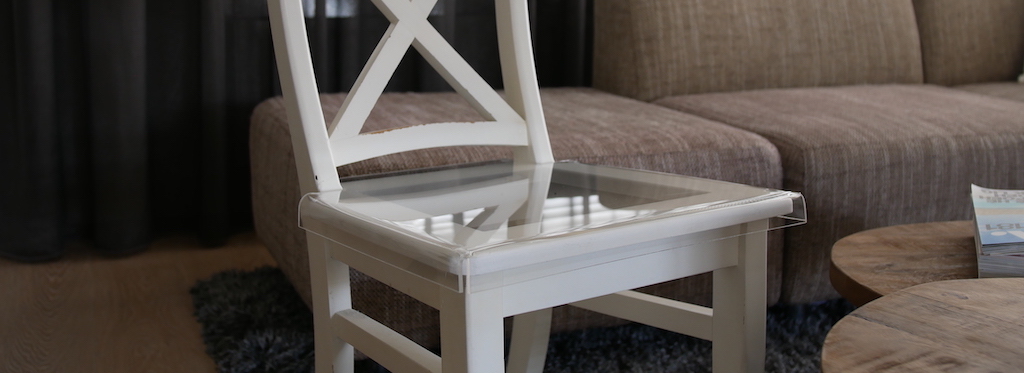
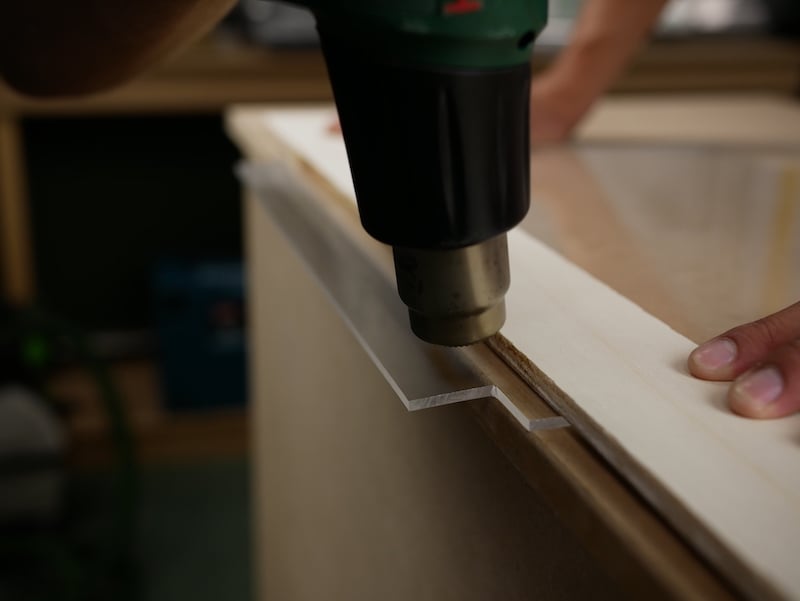
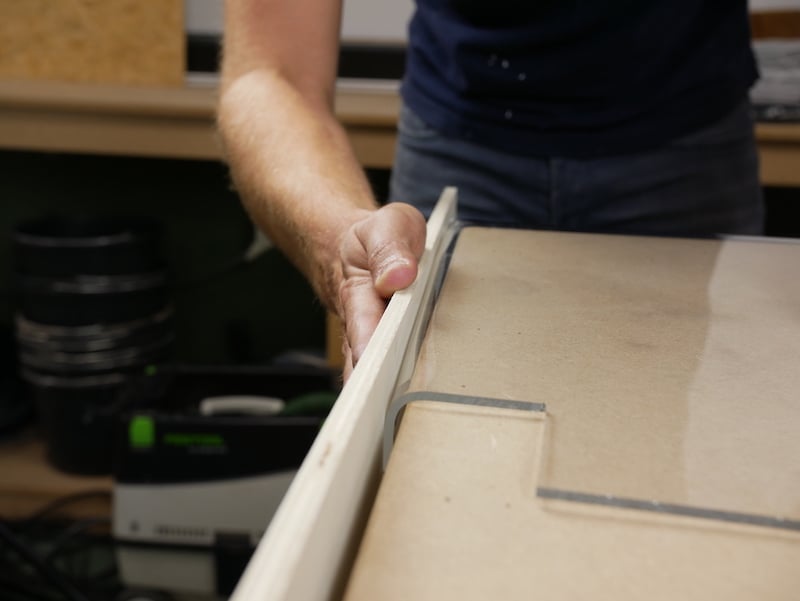
Step 3: Attaching the plexiglass seat to your DIY chair
Now that you’ve cut out the seat, you can attach it to the chair frame. Do this by bending the acrylic around the chair to secure the new seat properly. Carefully position the acrylic seat on the chair frame and heat the first wing using the paint burner. As soon as you see the material is becoming soft and flexible, bend the wing around the frame of the chair. Take your time over this and be careful that the material doesn’t break. Hold the wing in place until the acrylic sheet has cooled. Repeat with the other side and there you go: your ultra-cool acrylic dining chair is ready!
Order acrylic in your favourite colour
Acrylic sheet is available in many types and colours in our webshop so you can choose the sheet that best suits your interior decor. Find the correct thickness of the sheet material you intend to use with our free thickness calculator. For more tips, ideas and inspiration about working with acrylic, view our blog posts or contact us, we’re always happy to advise you.