DIY: Making a plastic toilet ceiling

Would you like to transform your toilet with stylish ceiling lighting? Adding toilet ceiling cladding and LED strips updates your toilet and gives it a luxurious, contemporary ambience. It’s inexpensive and the final result will amaze you! In this DIY blog, we give you step by step instructions on how to make a suspended toilet ceiling using gloss acrylic sheet.
You’ll need
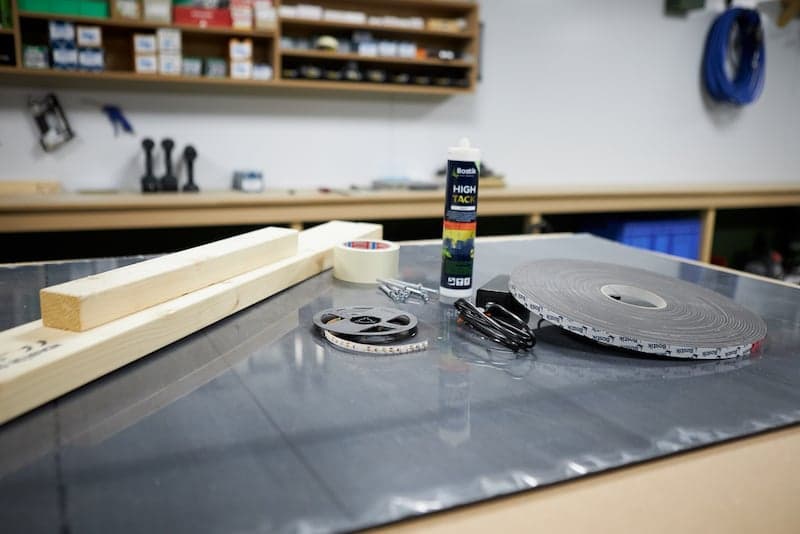
- Satin acrylic sheet anthracite 4 mm
- Fixxerss Foamtape – Insulation Tape
- Fixxerss ACP/Alupanel Super Fixx
- Impact plugs
- Short screws
- Drill with drill boots for wood
- Impact drill
- LED strips 220 volt
- Timber battens
The base for your toilet ceiling
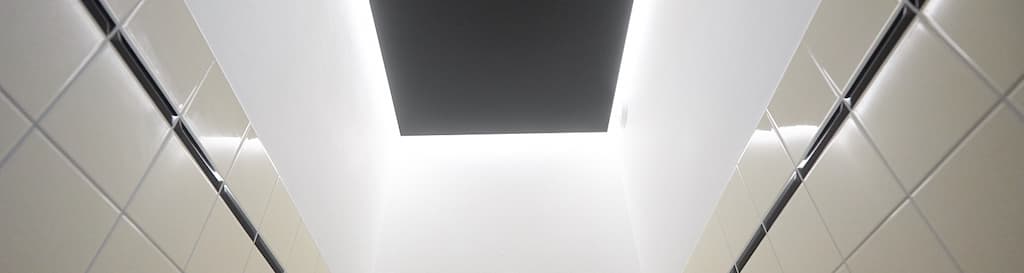
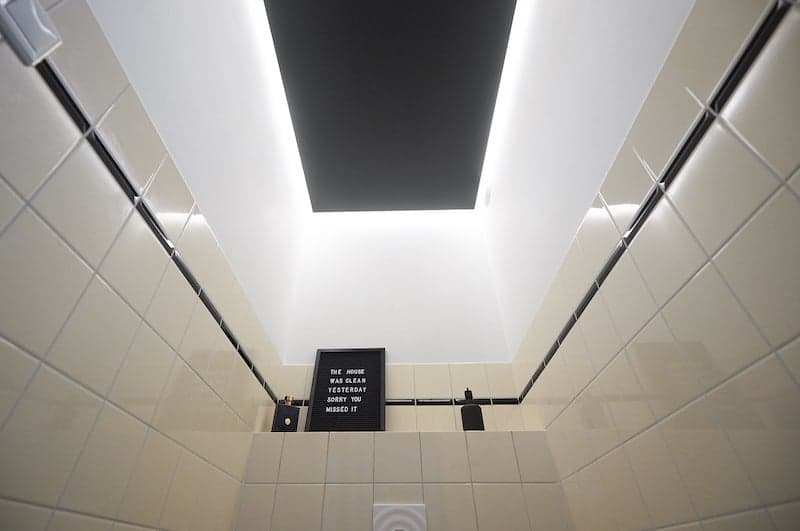
For the plastic ceiling in this demonstration, we’re using the matte side of a 4mm thick acrylic sheet in satin ebony colour with measurements 92 x 148.5 cm. This will create a black floating ceiling. We’re also using 220 volts LED strips in warm white. LED strips with a transformer can also be used. For the framework, we’re using pine battens.
Step 1: Measure your toilet ceiling
Measure the exact size of the ceiling in your toilet and subtract 3 cm around it. This tells you what size acrylic sheet you need. We allow 3 cm space around the sheet to create a shadow edge so that the LED lighting diffuses out around it. This gives the effect of a ceiling that seems to float.
Step 2: Order your plexiglass
When you know the right dimensions, order the plexiglass and the High Tack mounting glue. We saw all acrylic sheets to size for you free of charge. You can find the timber battens and LED strips at the local hardware store.


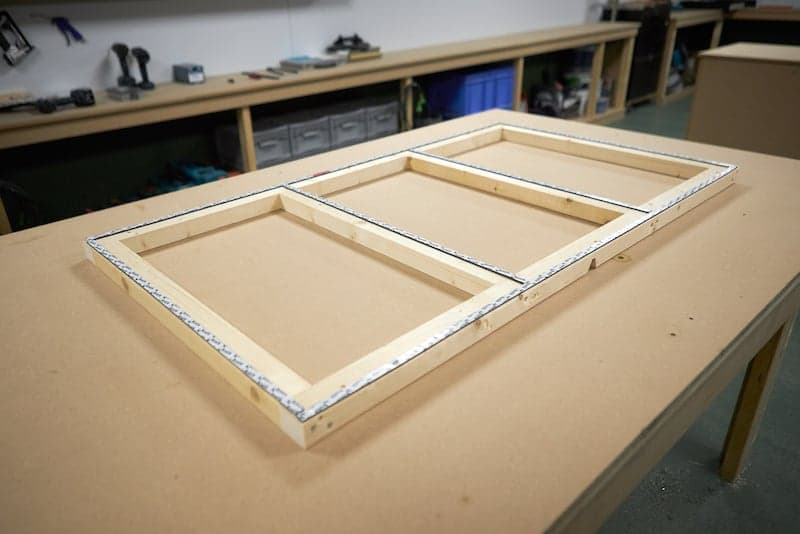
Step 3: Make your frame
In order to fix your acrylic sheet to the ceiling, you need a frame. Construct this using wood and take the light fitting in the toilet into account when positioning the battens. Make sure your frame is around 10 cm smaller than the acrylic sheet. This leaves room for the LED strips that you will stick on to the plexiglass.
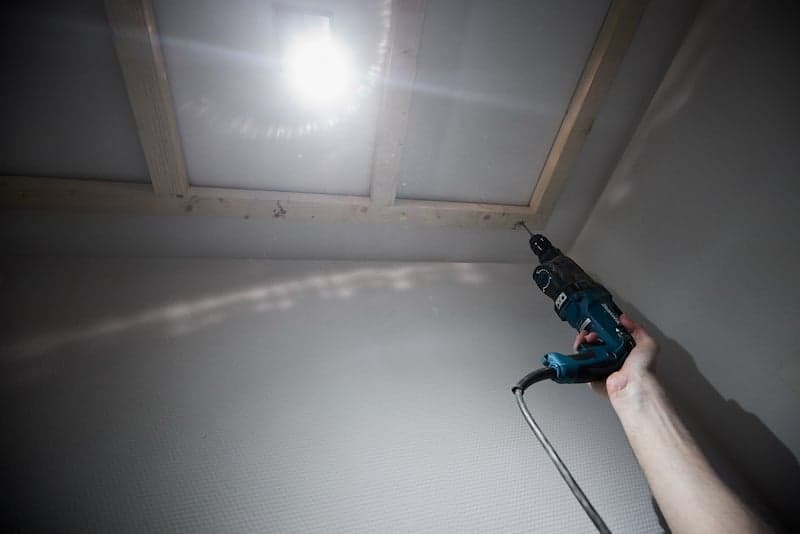
Step 4: Drill holes
Pre-drill the frame in 6 places. Make sure to also pre-drill the holes for the impact plugs. This is necessary because it is more difficult to drill through wood with a masonry drill. Drill the holes half a millimetre larger than the hammer drill bit.
Step 5: Fix the frame to your toilet ceiling
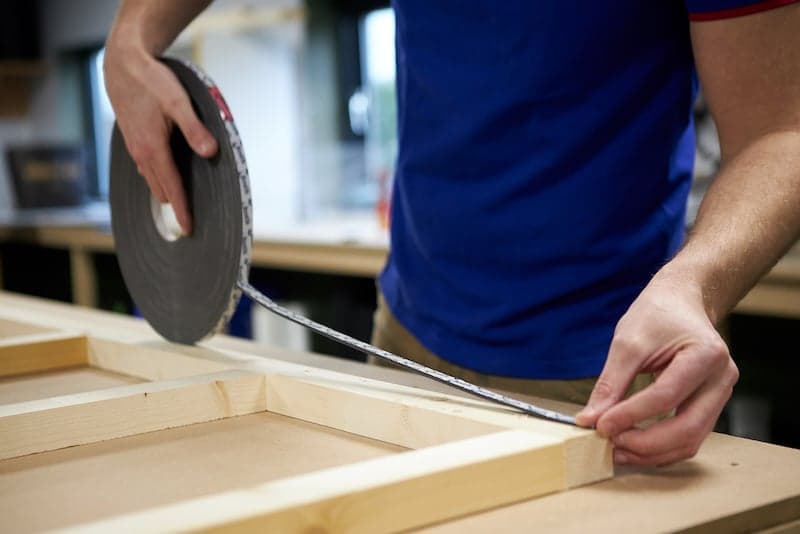
Stick double-sided tape on your wooden frame and then fix the frame to the toilet ceiling with impact plugs. The double-sided tape is necessary because you are going to attach the acrylic sheet with High Tack mounting glue. The plastic panel is held in place by the double-sided tape until the glue forms a strong bond.
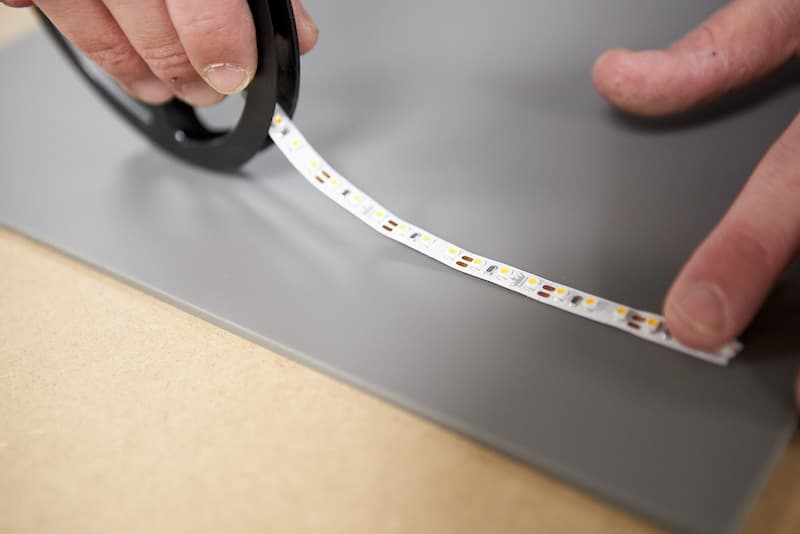
Step 6: Attach your LED lighting strips
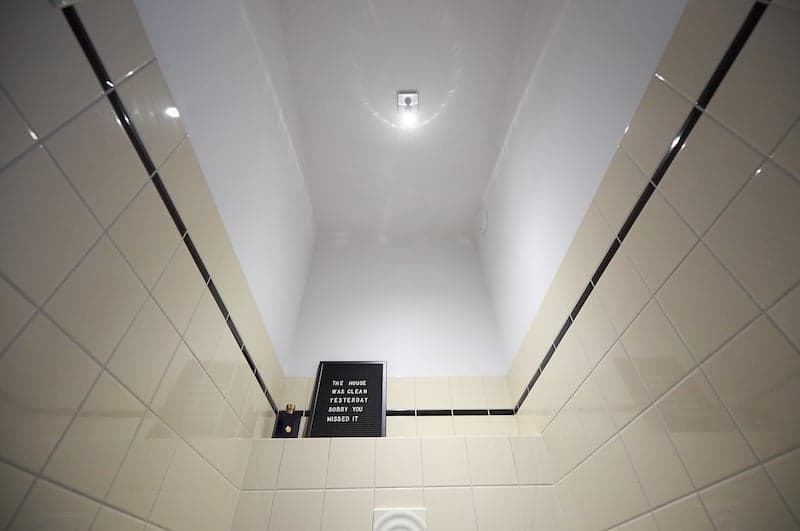
Stick the LED strips on the outer edge of your acrylic sheet and leave the cable long enough so that you can easily connect the lighting. Then remove the old light bulb and connect the LED lighting.
Step 7: Place the plastic panel against your toilet ceiling
Take the mounting glue and spray strips of glue 5 cm long in about 8 places. Press the acrylic sheet against the frame. You can do this visually or use spacers the width of the shadow seam (3 cm). These spacer blocks can be temporarily secured with a piece of tape on the long side and short side. This gives you confidence that you’re fixing the panel in the correct position. Turn on the light and enjoy your atmospheric toilet lighting.
Making a suspended toilet ceiling
Have we inspired you to make a DIY floating ceiling in your toilet with this blog? In our webshop, you will find acrylic sheets in a wide range of colours. We saw all plastic sheets to size for you free of charge. Do you have questions about making a plastic ceiling or about another DIY? Feel free to contact us at 0122-3976701 or send us an email.
Other blogs you may be interested in