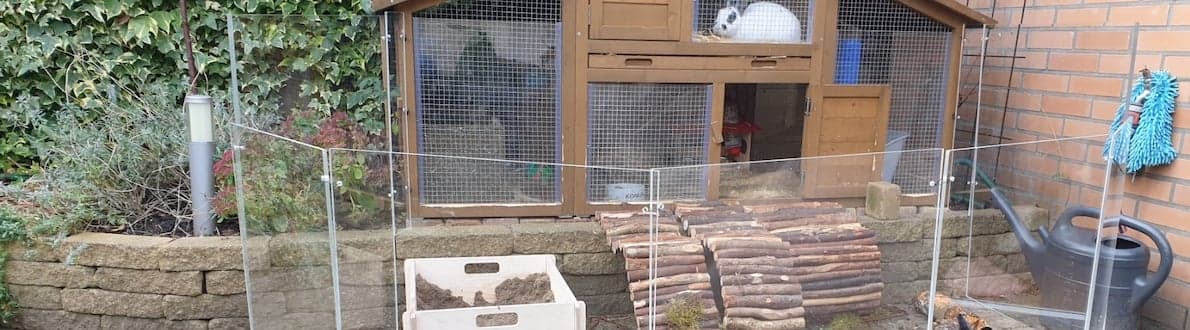
DIY weatherproof rabbit hutch

Would you like to protect your rabbit from wind, rain and cold? It’s easy to weatherproof your rabbit hutch with an acrylic windshield. This blog brings you tips and tricks for making a DIY windbreak/winter screen for an outdoor rabbit enclosure.
To make an outdoor plastic rabbit hutch, you’ll need:
- Clear cast (GS) acrylic sheet 4 mm
- Masking tape
- Fixxerss Foamtape – Insulation Tape
- Stainless steel spacer (4 pieces)
- Hand drill
- 9 mm HSS drill
- Base plate for drilling
Why choose cast acrylic to weatherproof a rabbit hutch?
We opted to use a cast acrylic sheet to make our windshield. This type of acrylic sheet is easier to process than the extruded (budget) version. We recommend a minimum sheet thickness of 4 millimetres to make a sturdy windshield. Moulded acrylic is 30 times as strong as standard glass. If your rabbit enclosure’s in a garden where football is played regularly, choose a 6 mm thick sheet for extra strength. Alternatively, opt for clear polycarbonate: vandal-proof!
Step 1: Determine the dimensions of your outdoor winter rabbit hutch windbreak
Make sure that your acrylic or polycarbonate sheet is 3 cms larger all around than the wire mesh. For example, if the mesh window is 40 cm x 60 cm, order a 46 x 66 cm sheet, so the sheet has a generous overlap. Order your acrylic sheet on our website, and we’ll cut it to size for you in any shape you require.
Step 2: Mount your rabbit hutch windshield
We advise mounting your windshield in a way that lets you remove it easily in summer. A windshield can cause temperatures in the rabbit hutch to rise in warmer weather, something we naturally want to avoid. To make mounting and removing easy, you can use special spacers for acrylic sheet. To mount these stainless steel spacers, you need to drill holes in the plastic sheet.
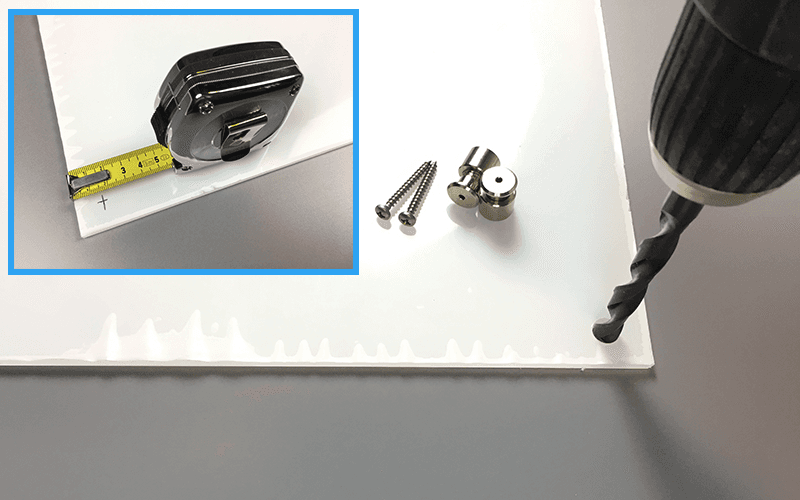
Step 3: Drill holes in your acrylic windshield
Drill holes for mounting 15 millimetres from the edge of the acrylic sheet. The holes will be on the corners and in the middle of the long side, a total of 4 holes. Acrylic is easy to drill as long as you prepare it properly. Follow these steps:
- Leave the protective foil on the acrylic sheet while drilling.
- Stick a strip of masking tape on one side and mark your drill holes on it.
- Place the sheet on a surface into which the drill can run out, for example, a wooden board.
- Drill the holes with a 9-millimetre HSS drill (metal drill) and a hand drill.
- Don’t apply too much pressure – let the drill do the work.
- Is the drill through the plastic sheet? Keep the drill running while pulling it back.
Step 4: Make your rabbit enclosure wind- and waterproof
Apply foam tape between the hutch and the acrylic sheet. This ensures that the edges are totally wind- and waterproof, and you’re protecting your pet from both wind and rain. Remove the protective foil from the sheet (on both sides) and stick the foam tape along the edges. Then hold the acrylic sheet in front of the rabbit hutch so that it’s positioned nice and evenly over the mesh. Now mark the drill holes on the rabbit hutch. Screw the base of the spacers into the wood at the marked points,
Step 5: Place the acrylic in front of your rabbit hutch
Secure the sheet by turning the head of the spacers by hand. Don’t overtighten them, or you risk breaking the sheet. For maintenance tips, check out our blog on cleaning acrylic sheet.
Are you going to make a DIY outdoor rabbit enclosure?
In our webshop, you’ll find everything you need to prepare your rabbit hutch for winter, including a wide range of acrylic and polycarbonate sheets and much more. We’ll saw all the sheets to size for you in any shape. Do you have your own design, or would you like to have the corners of your windshield rounded? Simply upload your design via a DXF file. If you have any questions about this blog or any of our products, please feel free to contact us.


