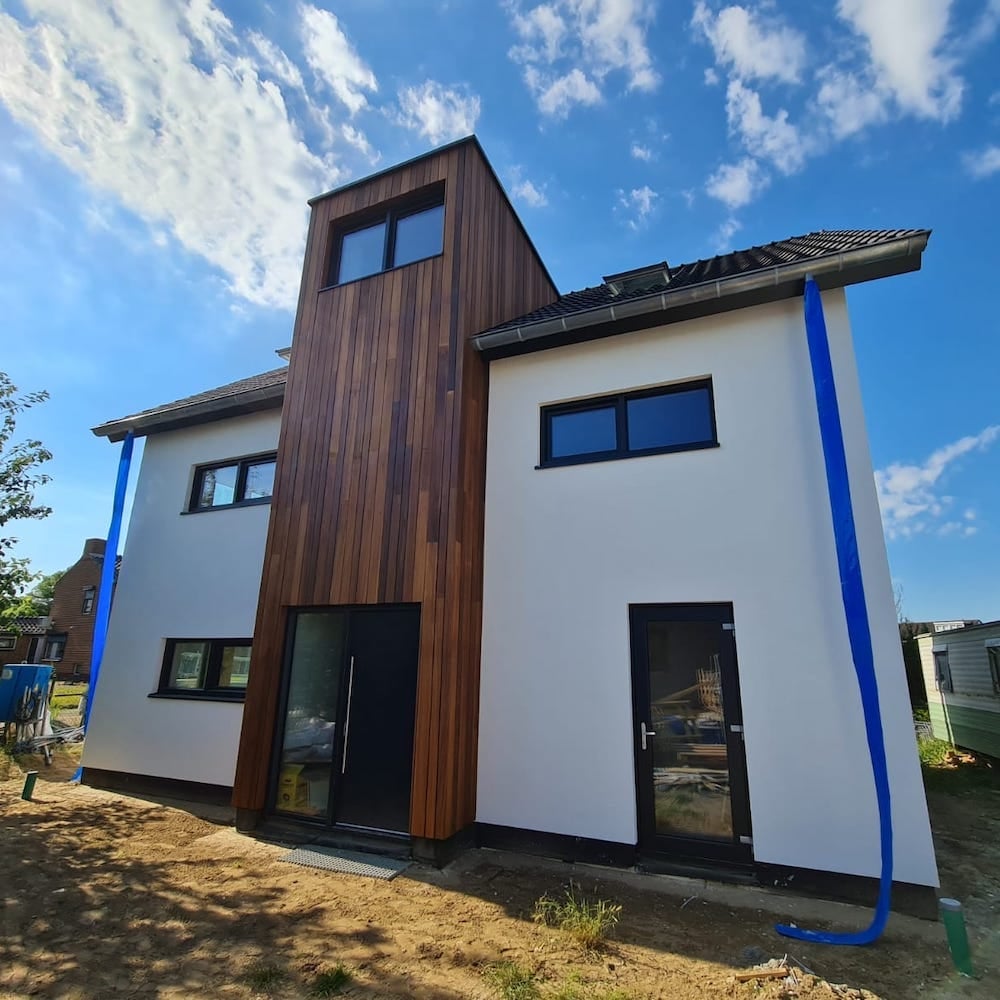
Thomas has accomplished an incredible feat by constructing his entire home from scratch using wood. He chose to finish the roof edges with special black HPL panels. The outcome was so remarkable that he secured the first prize at the DIY Awards in the third quarter of 2022. By personally placing each beam and meticulously installing the panels, Thomas has built a home that truly stands out.


The Project
Thomas has constructed a timber frame house entirely from scratch, finishing it with black structured HPL panels on the roof edges. His work reflects precise and skilful craftsmanship.
Thomas: “First, we ran a wire along the overhangs. Then, we mounted wooden slats and aligned them according to the wire, ensuring a smooth and flat base. […] Screw clamps were used to keep everything in place.”
Here’s a step-by-step guide to help you through the process
steps
-
Run a wire
Run a wire along the overhangs and level the slats to create a flat base.
-
Treat the slats
Treat the slats with Bostik SX Black primer.
-
Order
Order black HPL sheets cut to size, ensuring they fit closely, with minimal deviation.
-
Apply Bostik Paneltack adhesive
Apply Bostik Paneltack adhesive on the slats and use screw clamps to hold the HPL panels as you put them on.
-
Pre-drill
Pre-drill the HPL panels, and secure them with matching screws.
Supplies


Additional materials
Tools

Thomas’ Tips for Others
Thomas: “Ensure you have enough help and focus on creating a flat base by carefully levelling the slats. […] Also, with overhangs, make sure the standing sheet slightly extends past the ceiling sheet to account for minor irregularities in the base.”
Other DIY Awards
Get inspired by other people’s DIY Awards entries. Or enter too and stand a chance to win fantastic prizes!