When working with acrylic sheet, also known as acrylate or PMMA, unevenness in the surface can occur, such as, for example, saw marks after cutting it. This can be undesirable for various reasons. In the first place, because it does not look good, but also because such traces make it difficult to bond acrylic. Fortunately, it is fairly easy to polish acrylic so that the edges look beautifully finished and the sheets can be glued properly. With the help of a few simple tools and our tips, it’s easy to polish plastic acrylic.
Requirements for polishing acrylic sheet:
Extruded or cast acrylic?
Before polishing acrylic sheet, it is important to know whether the acrylic is extruded or cast. With extruded sheets (Plexiglas XT) you have to take into account the pressure with which you sand and polish. These sheets will melt more easily, creating a sticky, viscous edge. This is not the case with cast acrylic.
Sanding acrylic
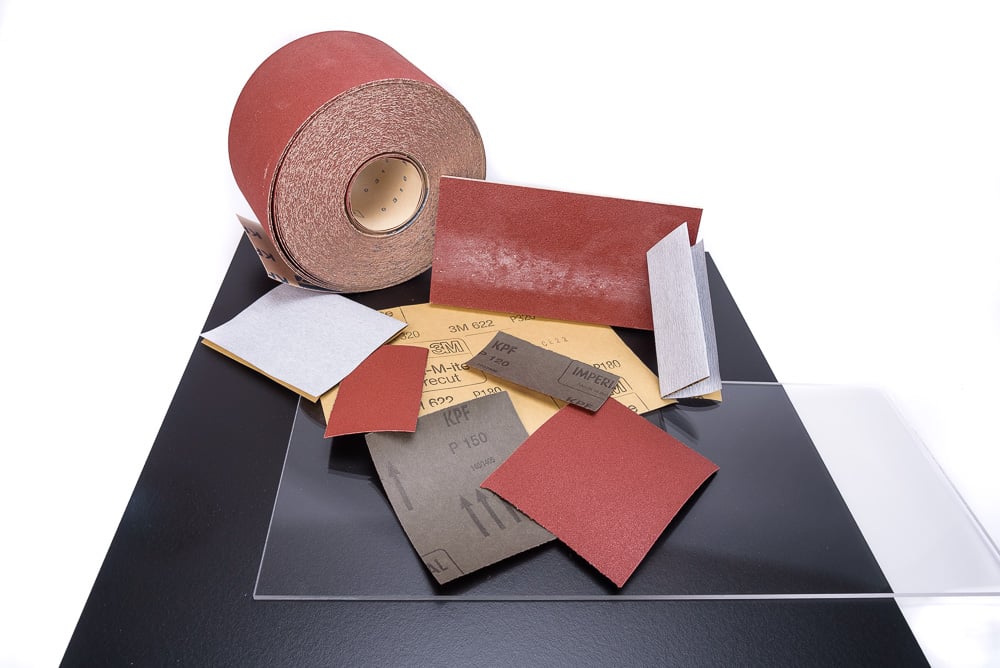
The saw marks that remain after cutting acrylic are known as kerf marks; traces also remain after machining (such as milling). The difference between the two is the depth of the tracks. Before starting to remove such tracks, the deepest grooves must be sanded away. Logically, you begin working on a saw mark with coarser sandpaper (grain 80) than with a machining mark (grain 200). Sand the edges nicely even and straight and then repeat this with a finer grain, increasing from 80 to 200 to 800. Eventually, a smooth, matte finish is created and this edge is now good enough to glue the sheet. You can read more about this in the article “Acrylic adhesives”.
Polishing acrylic
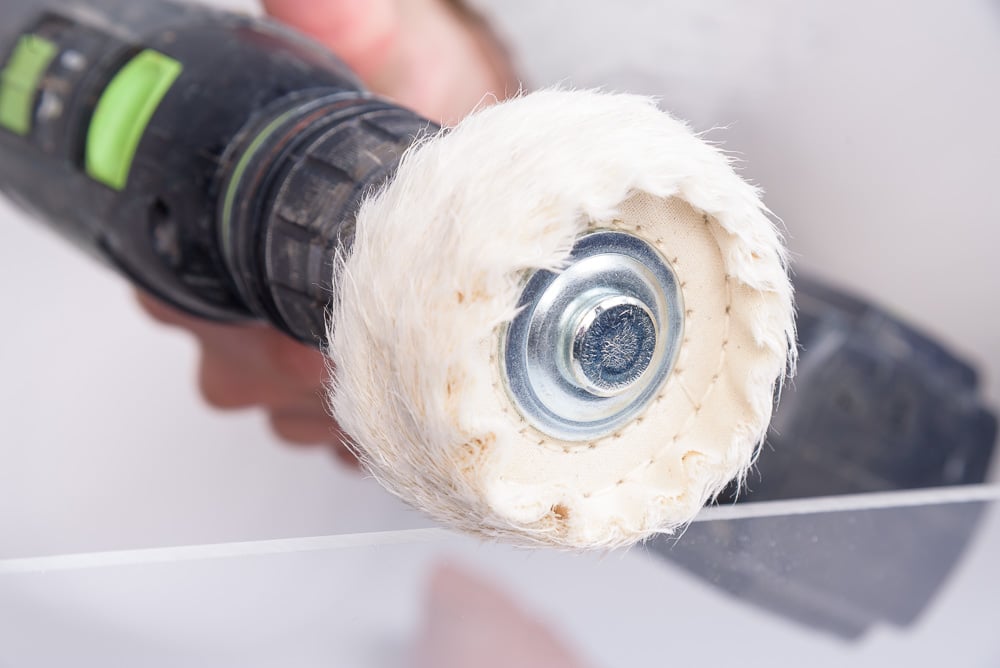
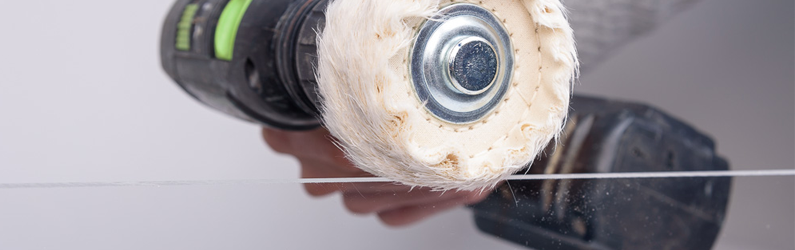
For the best aesthetic result, you can polish the edge until the edge is crystal clear Polishing pastes such as Zvizzer Heavy cut and Fine cut polishing agent that have been specially developed for acrylic are available for this task. You will also need a polishing disc and a drilling machine. Apply the paste on the edge and gently work over the edge with the buffing pad, apply light pressure and continuously check the result. You can gradually increase the pressure and the drill speed, but be careful and pay attention. With a little effort, the cut edges will become crystal clear again.
Scratches are best removed with a scratch remover (eg Xerapol), the grains in this paste are finer than in polishing paste. Put a little scratch remover on a cloth and gently rub small circles around the scratch using small circular movements. Check frequently whether the scratch is getting less noticeable and on the basis of your observations, determine how much pressure or scratch remover to apply.
Flame polishing acrylic
With the help of a burner, you can easily finish the edges of an acrylic sheet. Before this can be done, the edges must be sanded as described above. Not every burner is suitable for flame polishing, both the shape of the flame and the fuel have a major impact on the end result. Both propane and acetylene burners are suitable for flame polishing, which give a much hotter flame than a butane burner. The burner must have an (adjustable) end with which a “pencil flame” is formed. This is a tapered flame shape.
Once the edge of the acrylic has been sanded with fine sandpaper, place the sheet on a suitable (fireproof) surface. Light the burner and adjust the flame so that a stable and not too large flame is formed. The size must – as the name suggests – match the end of a pencil. For flame polishing, the cone of the flame (the brightly lit core) must not touch the acrylic. Aim the flame at the edge and bring the burner along the edge in one gentle movement (certainly not too slowly). The acrylic melts and will then set to a crystal clear surface. We recommend that you first practice this on a piece of scrap.