At plasticsheetshop.co.uk, every order is cut to size. This saves a lot of time and effort and you are also assured of a cleanly cut edge. We understand that you would sometimes like to saw your acrylic sheets yourself so we wrote the DIY blog ‘Sawing acrylic‘. However, you can also cut thinner sheet thicknesses. This saves a lot of time and gives an equally good result, especially with thinner plates.

What do you need for cutting acrylic sheets?
To begin with, you need a straight edge to support your knife during cutting such as a straight batten or a ruler. Whichever you use, it must be able to guide the knife well so it is important that it is quite thick and is made of a sturdy material. We advise against using a metal ruler: your knife can cut into it and it does not offer enough support for the knife. You can cut with a good hobby knife (Stanley) or a glass cutter. In addition, it is, of course, helpful to use a good water-resistant fineliner. The thinner the line, the more accurately you can cut.
Cutting acrylic does not mean that you cut right through the sheet: instead, you make a score mark in the material and then break it cleanly along this line. Fine splinters can be released during breakage, so eye protection in the form of safety goggles is a must. After breaking, you have to smooth the rough edges a little. You can do this with 200-grit fine sandpaper.
Step 1: Cutting
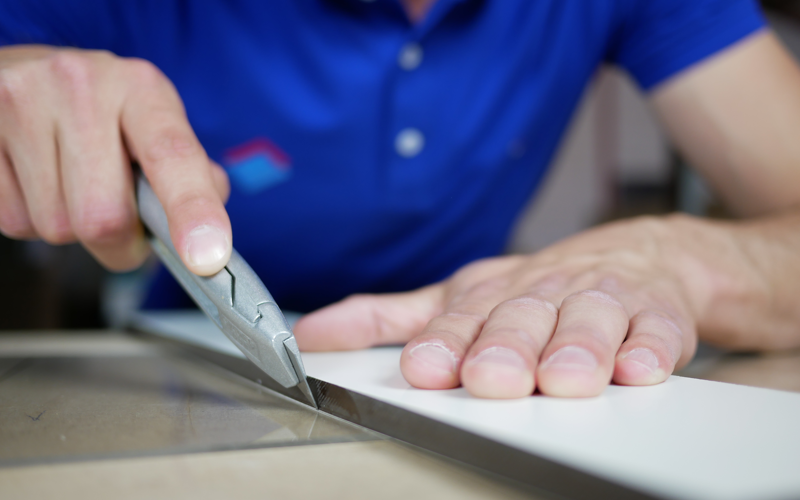
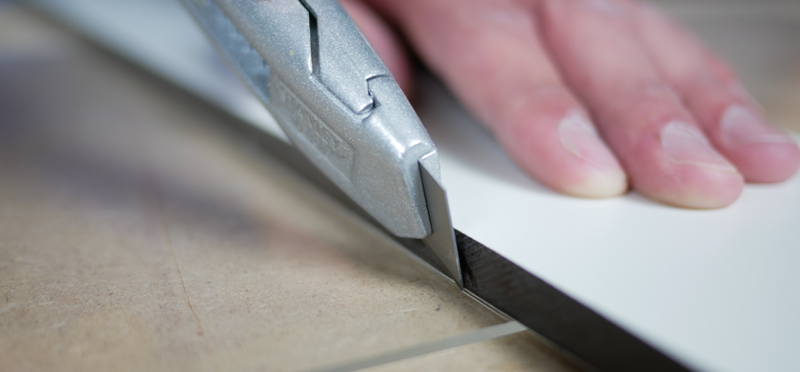
Acrylic sheet is supplied with a protective film on both sides. You must leave this on during cutting and breaking! You can mark the cutting line directly on the foil, on both sides of the plate. You are going to cut the plate on both sides. Place the plate on a completely flat surface, then place the ruler (or straight edge) along the cutting line and position the knife on the line. The guide (the ruler) must be positioned so that the knife moves straight along the marked line. Then you can score the fracture line, at least 5 times. Then you turn the plate over and score the fracture line on the other side at least 5 times.
Step 2: Breaking
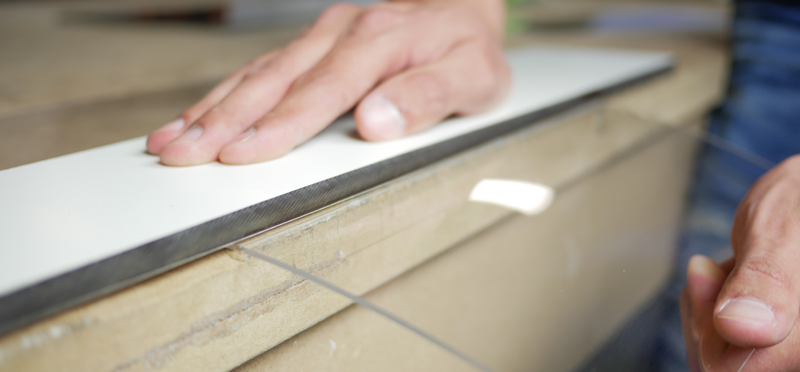
Next, put on your eye protection and place the sheet along a straight edge, for example on your table or workbench. The shortest side of the scored line must project beyond the edge. Press down steadily with the pressure distributed evenly across over the full width. You can also use a board with which you press on the plate for this. If you have cut correctly, the plate will break in one go.
Step 3: Finishing
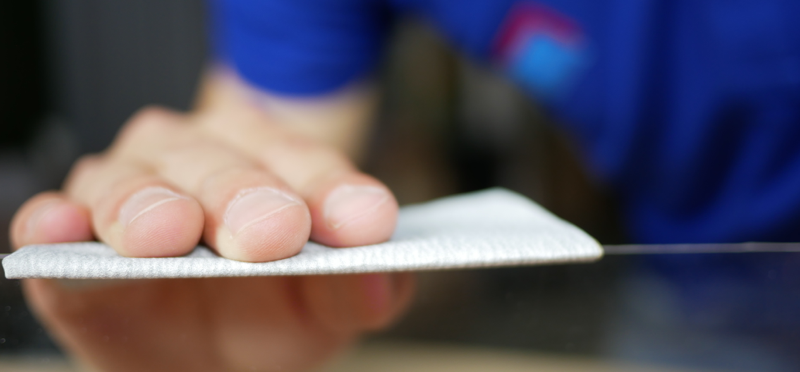
A break line always has a rough edge, so it is important to finish it neatly. You do that by scraping away any burrs. Move the sandpaper (grain 200) at an angle of 45 degrees from the plate over the edge. Do this on both sides. NB: still leave the protective film in place! If you want a really beautiful, crystal-clear edge, then you can flame-polish it. We have described how to do that in our blog ‘Polishing Acrylic’.