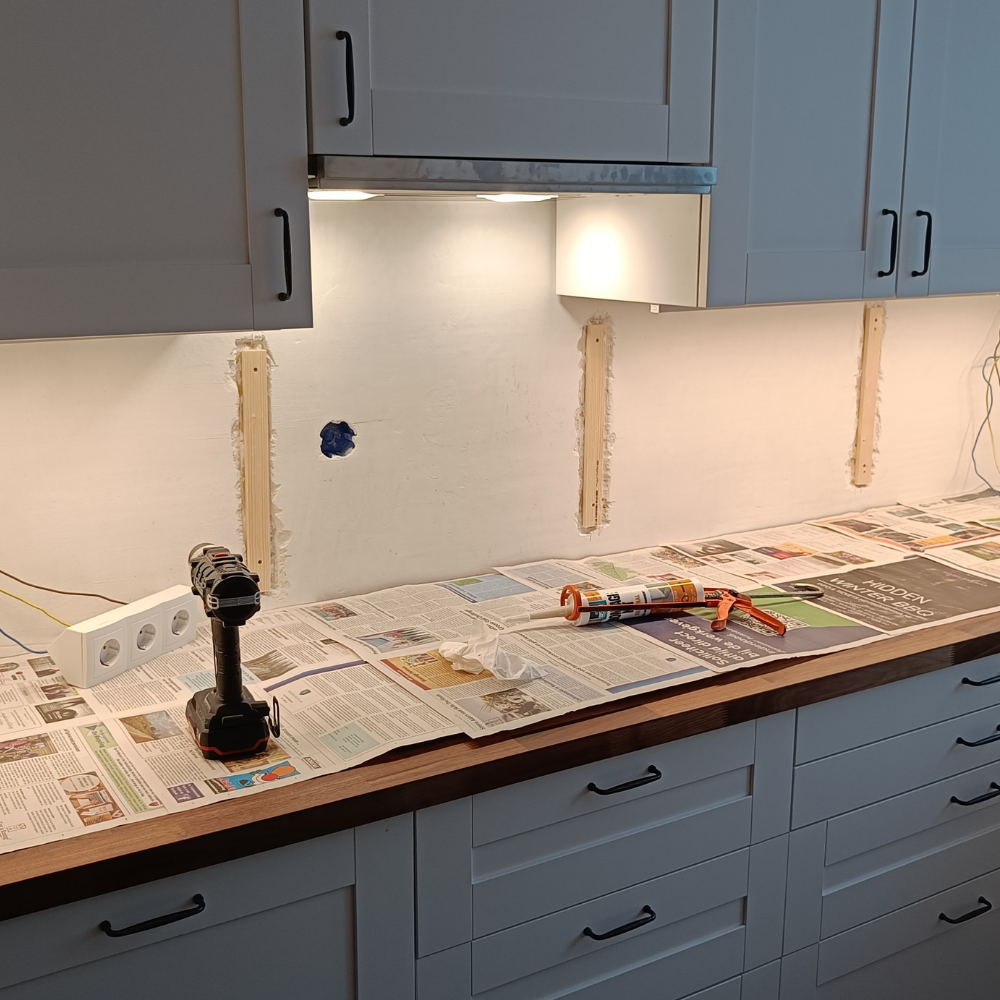
Robin has crafted a sleek kitchen splashback using white HPL, keeping his countertop as spacious as possible. He cleverly utilised wooden slats and a plywood board, resulting in a modern kitchen without losing any space. Despite some challenges, like dealing with the induction hob, the final outcome is beautifully sleek and neatly finished.


The Project
Robin constructed a kitchen splashback from white HPL for his kitchen. He embedded the slats into the plasterwork and secured a plywood board to a wall where it was challenging to create grooves. After priming everything, he attached the HPL panels using Bostik Paneltack adhesive. He sealed it all off for a pristine final finish.
Robin’s Process
Robin: “To avoid taking up too much countertop space with my kitchen splashback, I first chiselled grooves into the plaster. I then fitted slats into these grooves and primed them. The left side of my kitchen is constructed from cellular concrete blocks, which made it difficult to chisel proper grooves on that side. So, I decided to glue a 3mm plywood board to the wall and prime the entire board. Next, I lightly sanded the spots on my HPL kitchen splashback where the previously mounted slats had been and primed these as well. The following day, once everything was dry, I applied Bostik Paneltack adhesive to the wooden slats and the plywood board, and positioned the HPL panels against them. I pressed them firmly for a few minutes and then let them cure for several hours. To ensure a neat finish, I sealed the connection with the countertop using acrylic sealant.”
Here’s a step-by-step guide to help you through the process
steps
-
Chisel
Chisel grooves into the plaster and mount the slats and prime them.
-
Glue
Glue a plywood board onto a tricky wall and prime this board.
-
Sand
Sand the HPL kitchen splashback and prime the contact points.
-
Secure
Use adhesive to secure the HPL panels in place.
-
Press
Press the panels and let them cure completely.
-
Seal
Seal the connection with the countertop.
Used materials
Materials and Tools Used

Additional materials

Robin's Tips for Others
Measure carefully to determine the exact size of splashback you need, and think about how you’ll fit it between your countertop and cupboards. Since I have an induction hob, it was quite tricky to position the panel behind it because I hadn’t allowed for enough clearance. Ultimately, it fits snugly a few millimetres behind the upper cabinets, but I did need to trim a bit here and there.
Other DIY Awards
Get inspired by other people’s DIY Awards entries. Or enter too and stand a chance to win fantastic prizes!