DIY mini greenhouse in 5 easy steps

Fancy growing your own strawberries, herbs or other vegetables? Making a balcony greenhouse yourself from plexiglass, polycarbonate, or perspex sheets doesn’t have to be expensive or difficult. In this DIY, we’re going to show you how to make a small plastic greenhouse yourself, perfect for a garden or balcony.
Requirements for making the miniature greenhouse

- Clear cast (GS) acrylic sheet 5 mm
- Fixxerss Plastic UV Glue
- 2 hinges + 6 screws
- Saw
- Drill
- Goggles
- Masking tape
Benefits of a homemade portable greenhouse
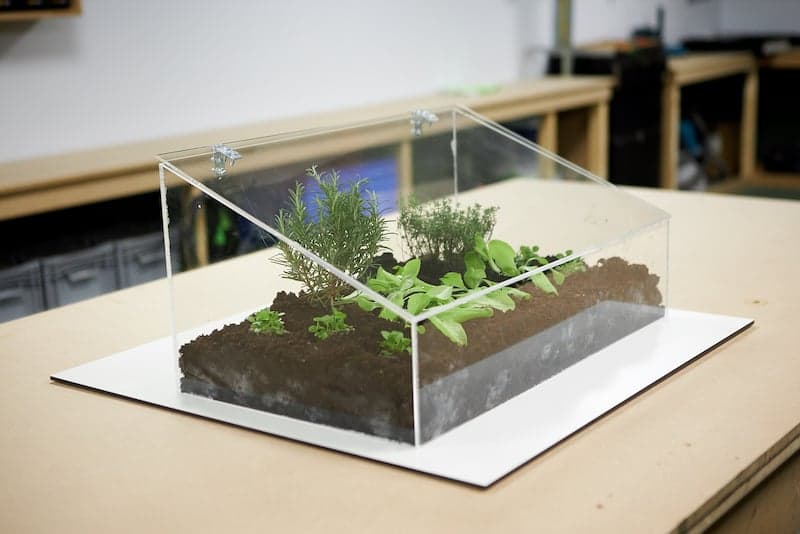
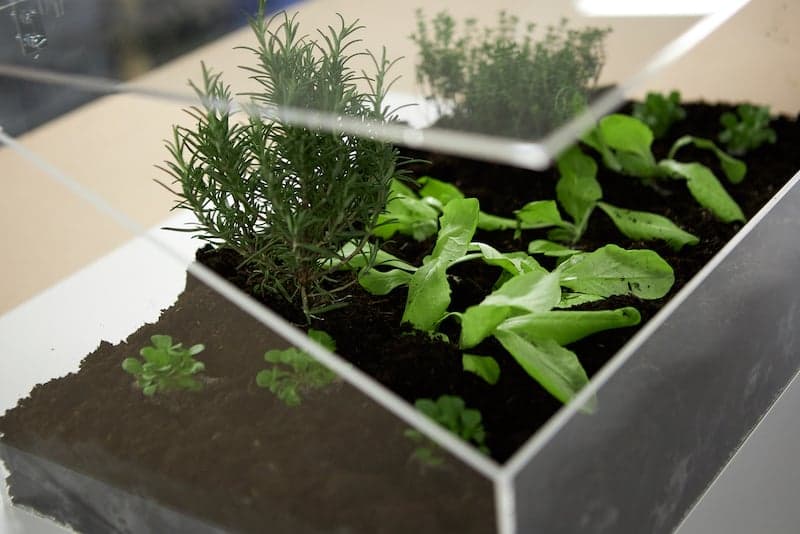
The best thing about making your own a mini greenhouse is that you can design it exactly how you want. Just like in a large greenhouse, the growth process is speeded up in a mini greenhouse. Thanks to the acrylic lid and the effect of sunlight, it creates a much warmer microclimate than outside. This allows you to plant certain vegetables and fruits, such as lettuce or strawberry plants, much earlier than you could in the ground.
The basis for making a DIY mini greenhouse
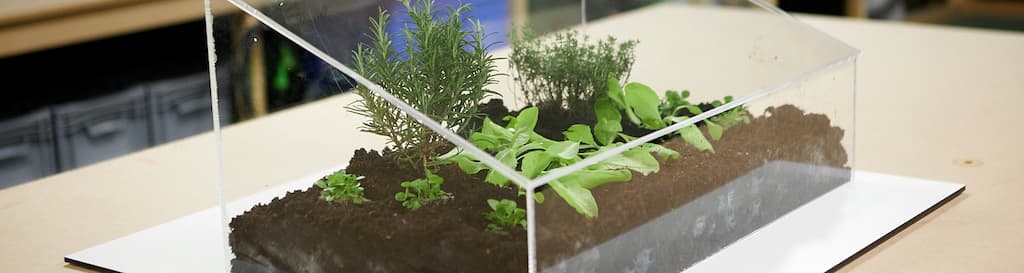
In this example, we’re making an acrylic greenhouse measuring 30 cm high, 65 cm wide and 40 cm long. The front of the propagator is 15 cm high. For glueing the acrylic sheets, we’re using Acrifix 192 acrylic glue and masking tape. We recommend that you use safety glasses when glueing.
These are the dimensions of the perspex sheets
Back: 1 x acrylic sheet, clear, 5 mm 65 cm x 30 cm
Front: 1 x acrylic sheet, clear, 5 mm 65 x 15 cm
Sides: 2 x acrylic sheet, clear, 5 mm 30 cm x 38.8 cm
Cover: 1 x acrylic sheet, clear, 5 mm 68 cm x 44 cm
Tip: Do you want a vandal-proof greenhouse? You can use polycarbonate sheets to make your greenhouse as they are virtually unbreakable. The method is exactly the same.


Step 1: Determine the size of your mini greenhouse
Before you start, it is important to first determine the size of your mini greenhouse. In this example, we’re making a small greenhouse, but of course, you can adjust the measurements as you please. Be sure to keep a 2 cm overhang for the lid.
Handy hint: the thickness of the acrylic sheet that you need depends on the dimensions you use. If you’re going to use larger dimensions and you’re not sure about the thickness, please consult our free thickness calculator.
Step 2: Order your acrylic sheet
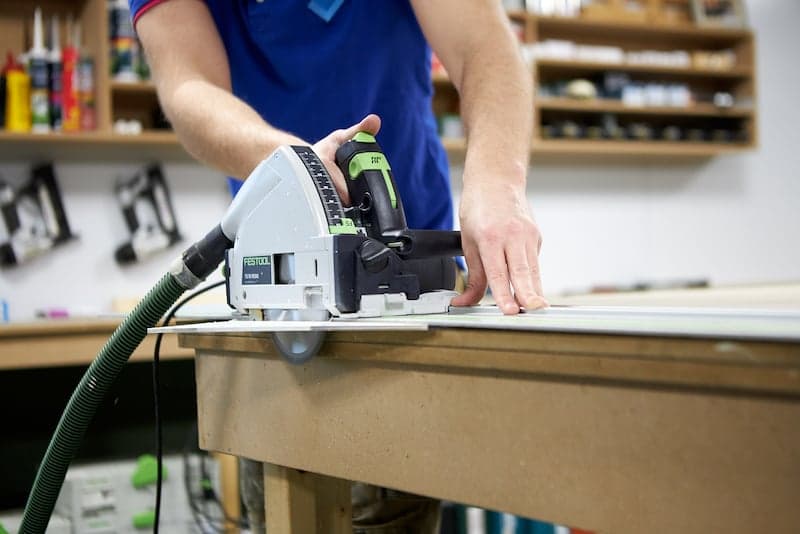
Once you have determined the dimensions for your plastic greenhouse, it’s time to order the acrylic sheets. Be sure to order cast acrylic instead of the cheaper extruded type, as you will be cutting the sides at an angle. The production process of extruded acrylic creates more tension on the sheet, and because it can break it’s more difficult to process this type of acrylic. We saw all rectangular sheets to size for you free of charge. You only have to cut the sides diagonally yourself.
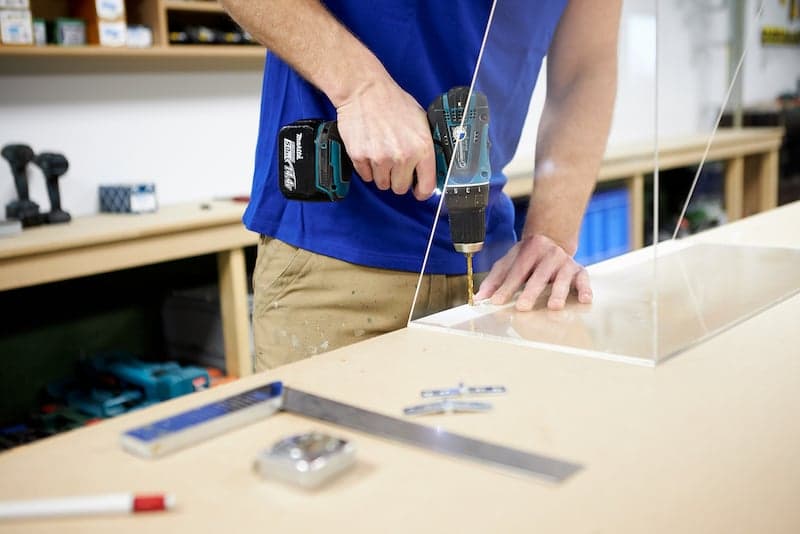
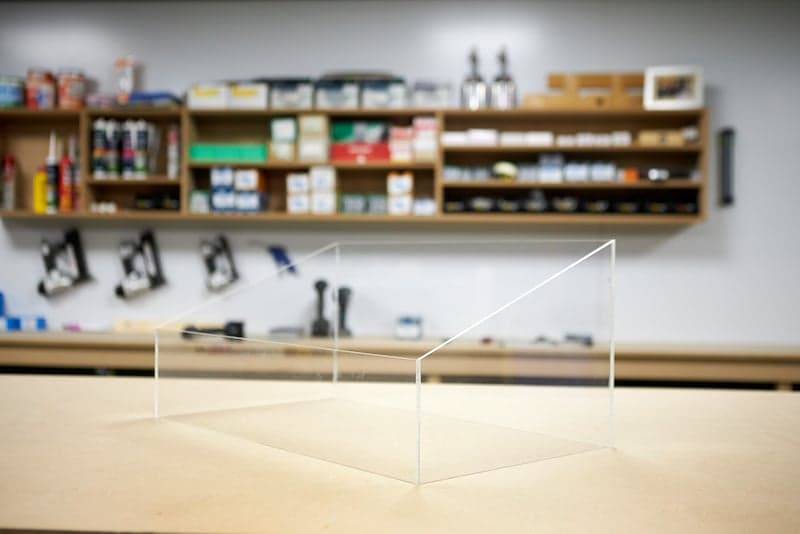
Step 3: Saw the sides of your greenhouse
Once your acrylic has been delivered, you can cut the sides diagonally. This allows the water to run off the sides. Mark the sides with masking tape before cutting them. We have cut the sides of our balcony greenhouse with a circular saw, but you can also use a jigsaw for this job.
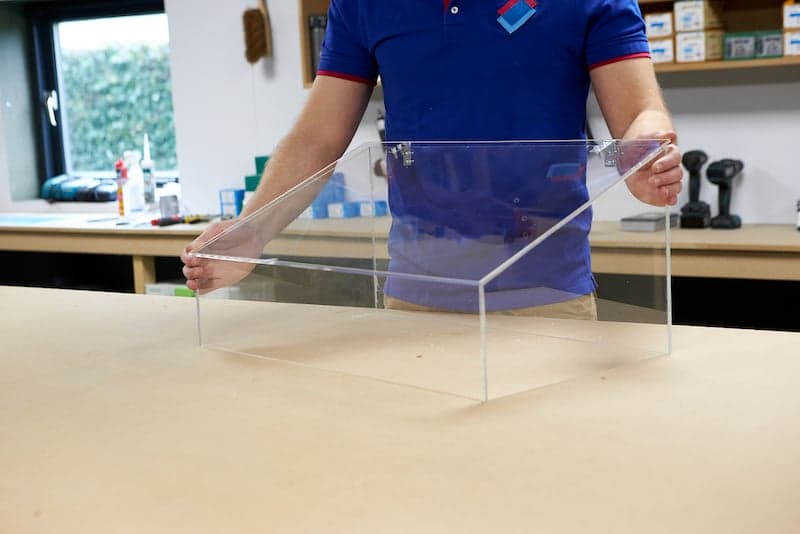
Step 4: Assemble your portable greenhouse
Place all the acrylic sheets on a flat, grease-free surface. A soft, thin cloth underneath will prevent scratches. Remove the protective film from one side of the back sheet and remove the protective film from one of the side walls (on the inside).
Stick masking tape on the acrylic sheet 5 mm away from the edges that you will be glueing. After applying the glue, fix the sheets with masking tape. Allow the glue to react for at least 20 minutes. Acrifix is a reaction glue that allows both sheet parts to flow together. Repeat this step until you have glued the sides on the front and back. After this, wait 3 hours for the Acrifix to cure properly.
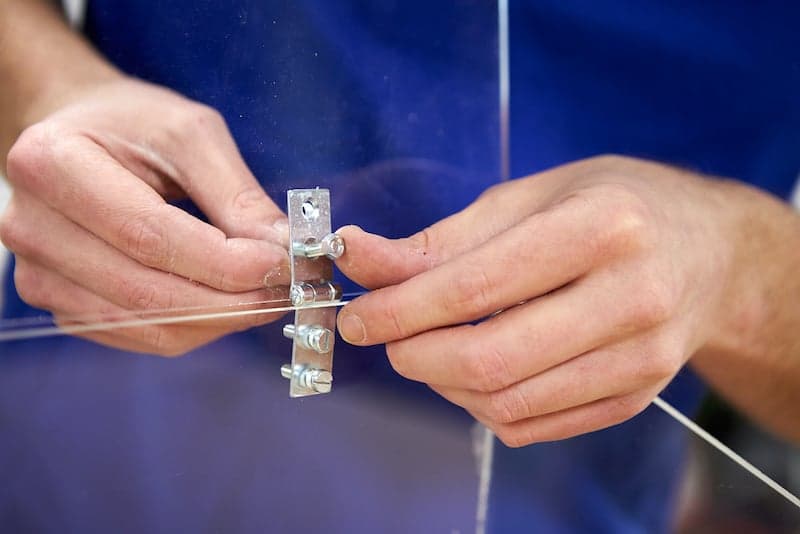
Step 5: Attach the cover of your miniature greenhouse
After the Acrifix has cured, you can attach your cover. Determine the location of the hinges using a measuring instrument. Now mount the hinges on the inside of the back of your greenhouse. Measure the holes of the hinges so that you know exactly where you have to drill in the lid to be able to attach your hinges to the top sheet. Attach the hinges to the lid et voilà: your balcony greenhouse is ready.
Maintenance of your portable greenhouse
Take the lid off your greenhouse regularly so that your plants can get some fresh air. This will also prevent pests and diseases. Clean the outside and the lid of your greenhouse with Burnus anti-static cleaner and a microfibre cloth. An anti-static cleaner prevents scratches and ensures that dirt cannot adhere.
Prefer to make a grow box instead of a greenhouse?
You can also use clear acrylic sheet or clear polycarbonate to make a grow box. Grow boxes are intended mainly for growing plants in the home. A grow box offers plenty of light and is suitable for growing flowers and plants, ideal for novice gardeners or children who want to create their own vegetable garden. Do you fancy tackling an even bigger version? Then you can also use acrylic sheet or polycarbonate to build a DIY greenhouse. Read how to do this in our blog: How to build a greenhouse.
Order acrylic sheet for your mini greenhouse
Are you inspired to make your own balcony greenhouse? In our webshop, you’ll find clear cast acrylic sheet in a range of different thicknesses. We saw the sheets to size for you free of charge.
Other blogs you may be interested in