DIY: worktop from HPL in 3 steps

If your workbench table top is damaged or worn, why not give it a new lease of life with an HPL panel? An HPL sheet, whether Trespa® or our own brand, is the ideal way to renovate and protect your work surface, as well as keeping it looking good. HPL is very hard, long-lasting and resistant to damage. And thanks to its high levels of chemical resistance, it’s easy to clean up paint spills etc using white spirit or thinner. In this simple DIY blog, we’re going to show you how to fix an HPL panel to an existing worktop.
You'll need:
- HPL panel in the colour of your choice
- Drilling machine
- HPL screws in a matching colour
- Glue clamps
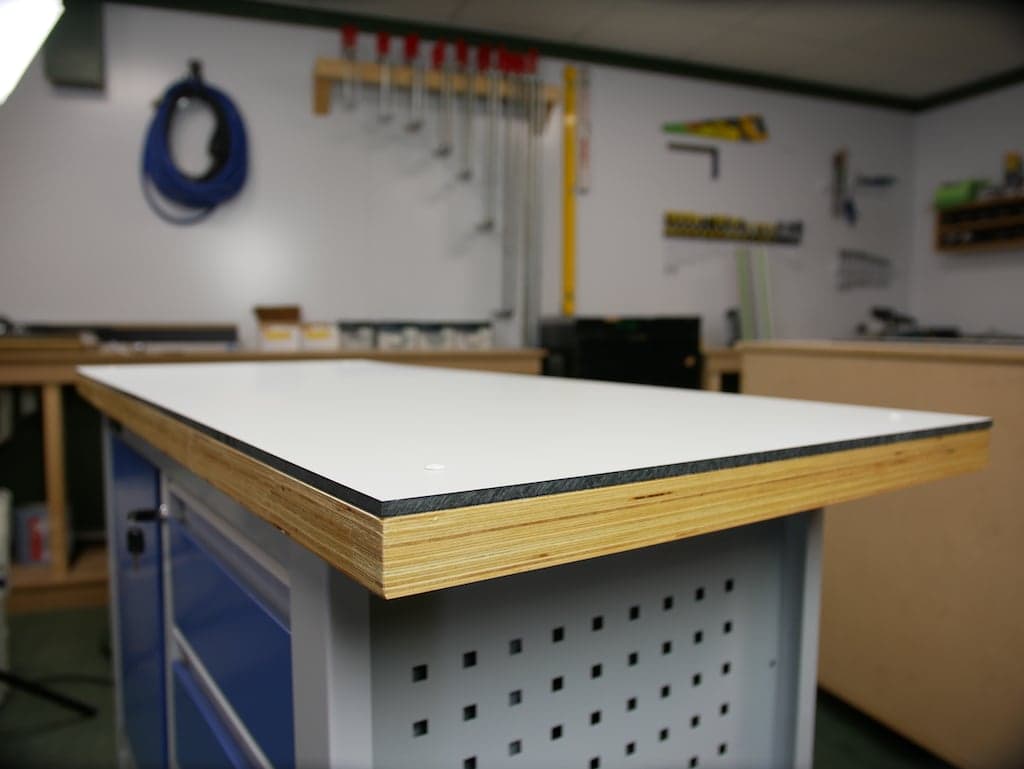
The basis for your homemade table top
We’re going to use an HPL panel to make your workbench tabletop. If you’re going to attach the HPL panel to an existing worktop, we recommend using a panel thickness of 4 mm. If you have only the base frame for your workbench, opt for a thicker panel of 10 to 15 mm, then you can be confident that your work surface will be able to stand up to all the DIY jobs you’re going to undertake.
Step 1: Decide the size of your worktop
To calculate the size of your worktop, first measure the basic frame. Then order a panel cut to size with the right dimensions or you can saw it to size yourself if you prefer. We’ll saw all HPL and Trespa® panels for you, free of charge.
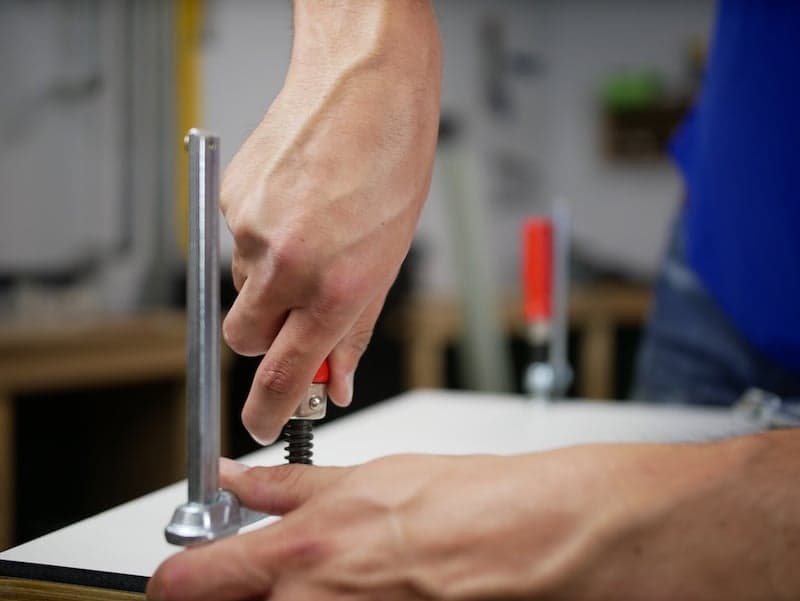
Step 2: Position the HPL panel on the frame
When you place the HPL panel on the frame or on the existing worktop, it’s important to clamp it in position. The last thing you want is for the panel to move during drilling. Place the panel carefully on the frame and secure it firmly with clamps.
Step 3: Drill holes in the Trespa® panel
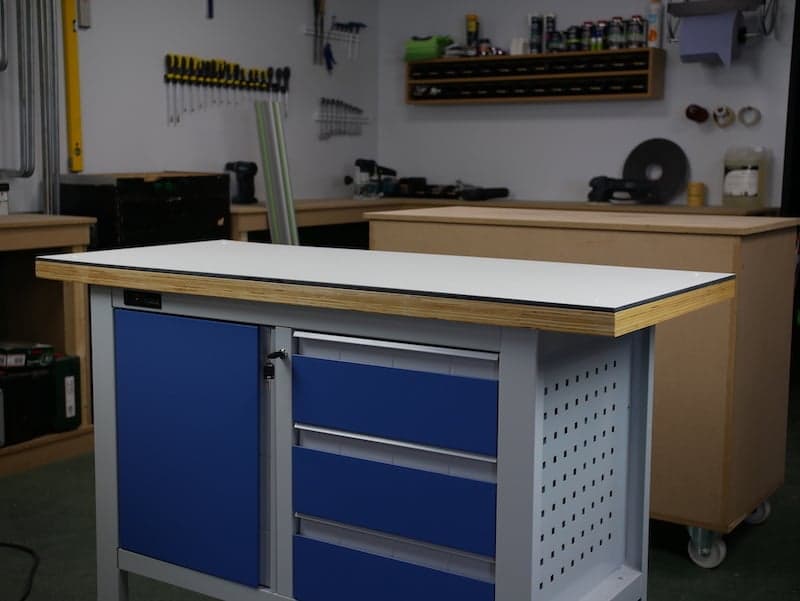
Determine where the holes should be and mark the positions. Drill the holes 1 mm larger than the screws. This is important because HPL panels will expand and contract as the temperature changes. By drilling the holes large enough, the screws will have enough contact pressure to hold the Trespa® securely in place. This will prevent the top layer from tearing or cracking. Then screw the panel to the base frame or the old work surface. Your new DIY worktop is now ready to use!


Keep your HPL worktop looking good
HPL or Trespa® is easy to maintain using Kenotek Brilliant Wash detergent. This mild shampoo leaves a protective wax layer behind that repels both dirt and water, preventing them from sticking to the panel. This helps to keep your work surface clean for longer.
Order HPL in your favourite colour
HPL and Trespa® sheets are available in a wide range of colours and thicknesses in our webshop, so you’re sure to find a panel that will be ideal for your workbench tabletop. For more information about processing HPL sheets, view our blog section or contact us.


Other blogs you may be interested in

