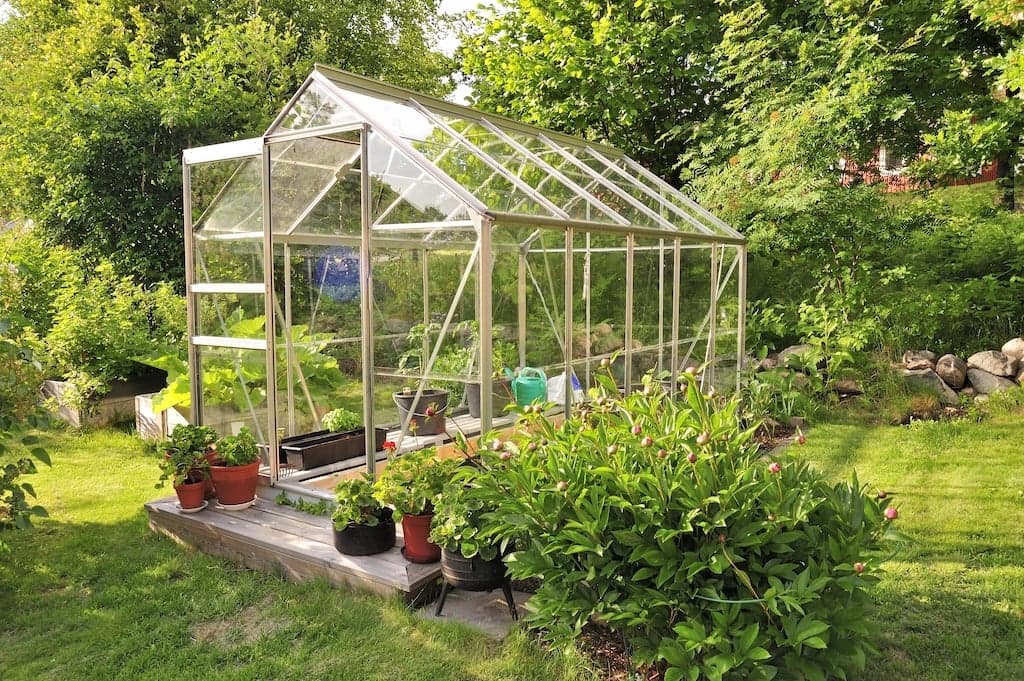
DIY: How to build a greenhouse

Nothing tastes better than freshly-picked salads and vegetables. But growing your own can be a challenge as pests, cold and rain can damage your harvest. The solution is a greenhouse made of acrylic perspex sheets or polycarbonate. It keeps out snails and birds out, and you can control the irrigation. This blog explains how to build a DIY greenhouse with crystal clear acrylic sheet or polycarbonate glazing.
Requirements for making a DIY greenhouse:
- Hardwood posts for ground posts
- Hardwood posts for the base
- Timber (spruce) beams for the side walls (minimum 50 * 30 mm)
- Corner brackets
- Stainless steel screws
- Aluminium U- and H-profiles
- Concrete (for pouring in the ground posts)
- Acrylic sealant
- Fret bolts 12 mm
- Drills 5, 9, 12 mm
- Countersunk screws, 3-4 mm
- Flathead screws, 3-4 mm
Step 1: Decide on the location of your greenhouse
The best direction to position your greenhouse is north-south to give maximum sun exposure and the best ventilation for your crops. Ventilation is essential because as heat rises, a great deal of moisture evaporates into the air. If this moisture gets trapped in the greenhouse, it can cause mould on your plants. Position the roof in a west-east direction for minimum wind load. If your greenhouse is in a windy location, you’ll need to anchor it well. In any case, a solid foundation is essential, even if your greenhouse is in a sheltered spot.
Step 2: Decide on the measurements of the greenhouse.
A full sheet of polycarbonate measures 305 cm long x 205 cm wide. Most greenhouses are around 250-280 cm high at the ridge, so the vertical sides are usually around 2 m high. You can saw three strips of 1 m x 2.05 m from a full sheet, which gives you enough width and height. The vertical uprights are spaced just over a metre apart, allowing you to construct a sturdy, wind-resistant greenhouse.
For the shorter wall, you can saw a full sheet into 75 cm wide strips, or we can cut it to size for you. If you make one part hinged, it’s a good size for a door.
Step 3: Lay the foundation of the greenhouse.
The foundation is constructed from hardwood posts measuring 60 x 60 millimetres. Screw the foundation battens into a rectangle shape with corner brackets or angle irons. Place this where the greenhouse will go. Next, install the anchor in the ground. We’re using six 70cm long hardwood posts for this. Four posts will go inside the corners of the foundation, and the other two will go halfway down the long side. Drive the posts into the ground as far as possible. The heads must non more than 6 cm (the width of the foundation posts) above ground level. If the heads protrude too much, cut them to size later. Another option is to dig holes and set the posts in concrete. This method gives an even stronger result than driving the posts into the ground.
Step 4: Anchor the foundation
Use 12 mm fret bolts to secure the foundation to the ground posts. Pre-drill the holes in the hardwood. Start with a 5 mm drill bit, followed by 9 mm. Lastly, drill a 12 mm hole through the foundation beams only. Drill one mounting hole at a time. Secure the foundation beams at one corner with a fret bolt, using a spirit level to determine the next drill hole / mounting point.
Step 5: Make the frame for the sidewalls of your greenhouse.
Using corner brackets, screw the uprights onto the long side of the foundation. Place them opposite each other on the left and right sides. Connect these two uprights at the top using corner brackets and a cross beam to stop them from falling inwards. When you’ve mounted all the uprights, temporarily fix a longitudinal beam over them. Now the framework of your greenhouse is strong enough for you to install the plastic windows.
Step 6: Install your acrylic or polycarbonate windows
We are going to install the windows in aluminium U-profiles. You can buy these at any hardware store. There are usually screw holes in the bottom of the profile, so you can easily screw the profile to the uprights. At the corners, saw the profiles with a mitre so that they fit together neatly. Now fix the U-profiles to the foundation beam and the uprights with screws. Use all the screw holes that are pre-drilled in the profiles for maximum strength. Finish the profiles by applying foam tape against the inside and outside of the profile. This stops the windows from rattling. Sealing the windows also helps prevent this.
Now carefully lower the windows into the profiles from above. If there’s even a small amount of breeze, you’ll notice that the wind exerts a significant force on the construction, so we’ll continue working quickly to finish the greenhouse and make it stronger.
Step 7: Determine the construction of the roof
A key advantage of making a DIY greenhouse is that you can construct it according to your needs, and this also applies to the design of the roof. For example, you could go for a traditional pointed roof, a pent roof or a flat roof. The roof construction is supported by a beam on top of the vertical uprights on the long side. This beam is known as the wall plate and is mitred. ndThe angle of the mitre corresponds to the pitch of the roof. The flat side of the wall beam rests on the uprights. Place the roof trusses on the sloping side. So the mitre of the wall plate will depend on the style of the roof and its pitch. Calculate this before you start; you can get beams mitred along their length at most hardware stores.
Step 8: Construct the greenhouse roof
The wall plate is positioned on top of the uprights; screw it to the uprights using corner brackets. Build the rest of the roof structure in the same way. If you’ve gone for a traditional greenhouse shape, also include a rider in the construction. This is a beam on which you mount the ridge (the cover over the top of the roof). We recommend placing hinges in a section of the roof so that you can open it for ventilation if the temperature gets too high.
You’ll find a wide variety of brackets at hardware stores, so you’re completely free to design a roof construction yourself. But the most important point is the method of mounting the plastic roof sheets on your greenhouse, which is different from mounting the windows.
Step 9: Place the greenhouse roof on the wood.
The roof isn’t mounted in U-profiles but screwed directly to the wood. We recommend choosing polycarbonate sheets for the roof material. This sheet material is extremely strong, so the risk of breakage from hail or flying branches is next to zero. All the screw holes in the polycarbonate must be pre-drilled. Drill a screw hole every 15 centimetres. Don’t use countersunk screws, but ordinary flat screws. This prevents tearing when you tighten them. If you’re mounting two panels next to each other, use an H-profile between both panels to ensure a seamless connection. When all the roof panels are in position, you can start finishing.
Step 10: Finish your greenhouse with sealant
If you’ve chosen to go for a traditional greenhouse with two sloping roof halves, you must finish the roof with a ridge to prevent rain from getting in. Then seal all edges: the open sides of the polycarbonate sheets, the edges along the H-profiles and the edges along the ridge. Finally, seal the seams along the glazing. It’s an excellent idea to install gutters and a rain barrel so that you always have rainwater on hand for your greenhouse plants. Your greenhouse is now ready for use: all that remains is to add some staging and a row of patio slabs or bricks to walk on.
Would you like to build a cheap greenhouse yourself?
In our webshop, you’ll find a wide range of acrylic sheet and polycarbonate ideal for constructing a DIY polycarbonate greenhouse. We’ll cut all the sheets for you in any shape you like. If you’d prefer to make a small greenhouse, check out our blog: “Making a propagator in five steps”. If you have any questions about this blog or any of our products, please don’t hesitate to get in touch.


