DIY: acrylic showcase

Why buy a display cabinet if you can make one yourself? It is not difficult at all to make a display case yourself, and certainly not if you use acrylic sheet as the basic material. An acrylic showcase has many advantages, the material is not expensive and it is, of course, nice to bring your own design to life. In this blog, we explain how to go about it: with these tips, you can hardly go wrong.
Requirements:
- Cast acrylic
- Sandpaper Grit 400
- Fixxerss Plastic UV Glue
- Rubber gloves
- Masking tape
- Block hook
- Spirit level
- Flat workbench / Dining table
- Vuplex plastic cleaner 235 ml
Acrylic showcase: the advantages
A display case is a great way to show your beloved collectables, and of course, you want a display that fits well with your items but which does not distract too much from your collection. Acrylic sheet is an ideal material for a display case, for various reasons: firstly, acrylic is available in various colours and thicknesses. This allows you to tailor the design of your display case to the items you want to place in it. Secondly, acrylic sheet is easy to machine, you can saw, mill, bend and polish it. In our DIY blogs, you will find many useful tips on how to do this. Even the less handy do-it-yourselfer can get along well with acrylic. Thirdly, acrylic glues perfectly. As a result, you no longer have visible screws on the corners and top edges. This last aspect has ensured that almost all showcases are made of acrylic sheet. Take a look at our range of acrylic to gain design inspiration. By the way, choose cast acrylic, this type is stronger and easier to work than extruded acrylic sheet. You’re always good with cast acrylic.


Step 1: Create your design
Do you have an inspiration? Beautiful, you can start with your design! We are happy to give you the following pointers: take the load on your shelf into account. Do you want to display light items (such as model cars), or do you put heavier items (such as pottery or figurines) in your display case? For lighter items, a sheet thickness of 3 millimetres is sufficient. If you are going to put heavier things in your display case, choose a sheet of 5 or 6 millimetres thick. We also advise you to make a middle support halfway between the carriers with a wider display case (wider than 50 centimetres). This also prevents deflection. If your display is 30 centimetres deep, then a middle support of 10 centimetres deep (1 / 3rd) is large enough. Tip two: is your display case fixed to the wall, or will it stand on the floor? The area that supports the display case (the back wall or the side walls) must be strong enough to carry the case and its contents. Therefore, use somewhat thicker acrylic for this part, 6 millimetres is sufficient. Tip three: Does your floor showcase stand on carpeting? Then a foot plate is important to prevent tilting. With a footplate, the display case will not sink into the floor covering and it is much firmer. This is less important for a display case that is placed on a hard floor (parquet, laminate, concrete). You can simply place such a display case on the floor with the side walls forming the base.
Step 2: The preparations – Work tight and square
When your design is ready, you simply order the required material in our webshop. We saw all sheets for free so that you are also assured of beautiful, right angles. Now you can start with the preparations because only with the right preparation you can work neatly and build a sleek display case. It is of great importance that all connections are perfectly square, and therefore a flat worktop (a workbench or a large dining table) is of great importance. Furthermore, a block hook, level and roll size are indispensable. You also need a roll of masking tape and Acrifix acrylate glue. To prevent scratches in the acrylic sheet, leave the protective film in place.

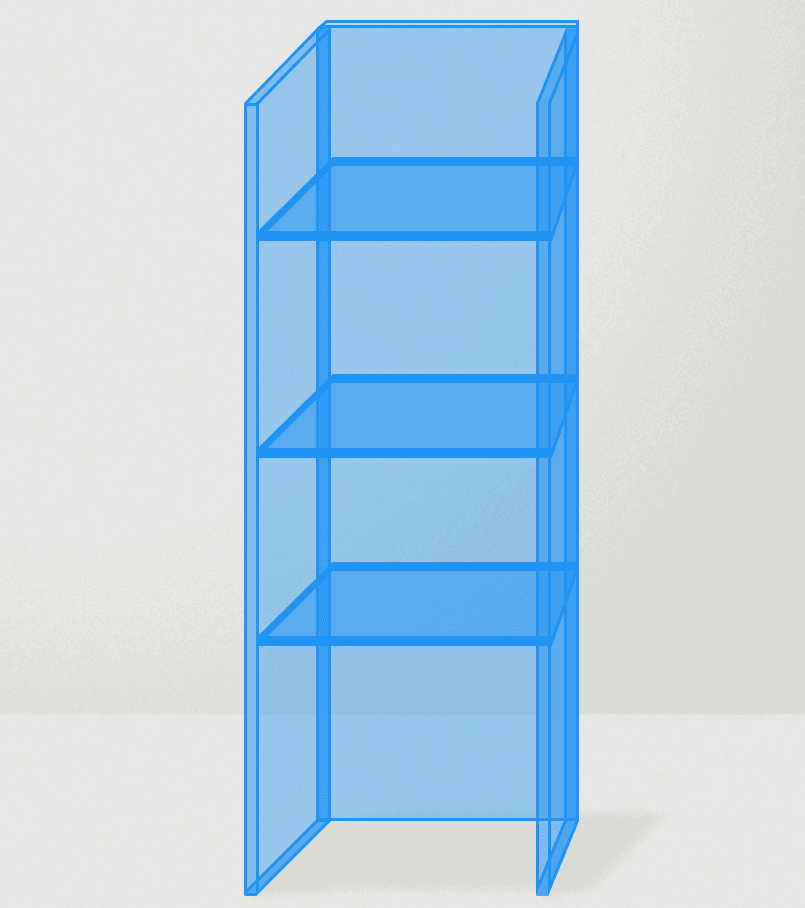
Step 3: Assemble the back wall and the side wall
The first step is to join the back wall to one of the side walls. It is important that the angle between the rear wall and the side wall is a perfect right angle. Remove the protective film from the sides that you are going to glue and leave the foil on the outside of the sheets. Then sand the top side of the back wall with 400 grain, this promotes the adhesion of the acrylate glue. Then place the block hook and a few pieces of masking tape ready. Now put your rubber gloves on, the acrylate glue can cause irritation if it comes into contact with the skin. Apply the acrylate glue to the long end of the back wall. Be careful with this, the acrylate glue is very thin and easily runs out. Then you place the back wall on the workbench and place the side wall against the back wall. With the block hook, you ensure that the angle between the back wall and the side wall is a perfect right angle. Then fix the sidewall with the help of the tape. Check several times that the angle is right. Let the glue harden for 20 minutes. In principle, acrylate glue is a solvent that fuses both parts together, so the gluing of acrylic is a chemical welding process.
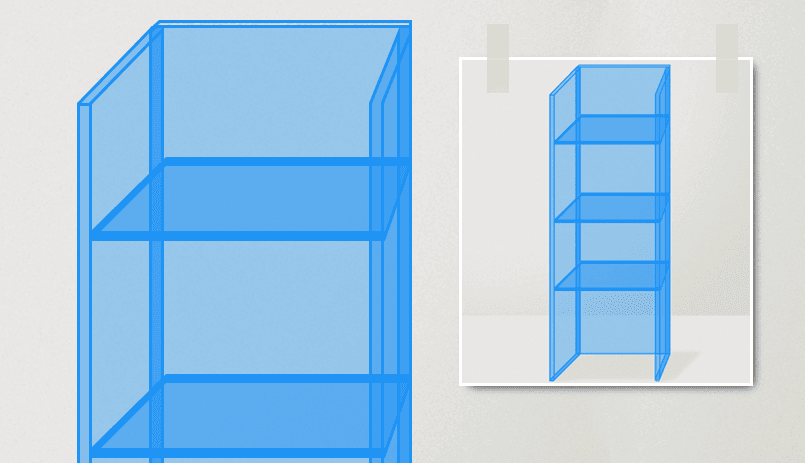
Step 4: Place the supports
If the glue connection between the side wall and the back wall has hardened, you can place the supports. Using a soft pencil (HB), draw the position of the supports on the side wall and on the back wall. Then you sand all the edges of the supports that are glued in this step: one side and the back. Now you can place the supports in the display case, you do this one by one: apply the glue to a support and place it in the display case. Using the block hook and spirit level, set the support straight, and fix it securely during drying with the tape. In the same way, place the other supports, and, if necessary, the middle supports. Make sure that the supports do not protrude from the side to be mounted!
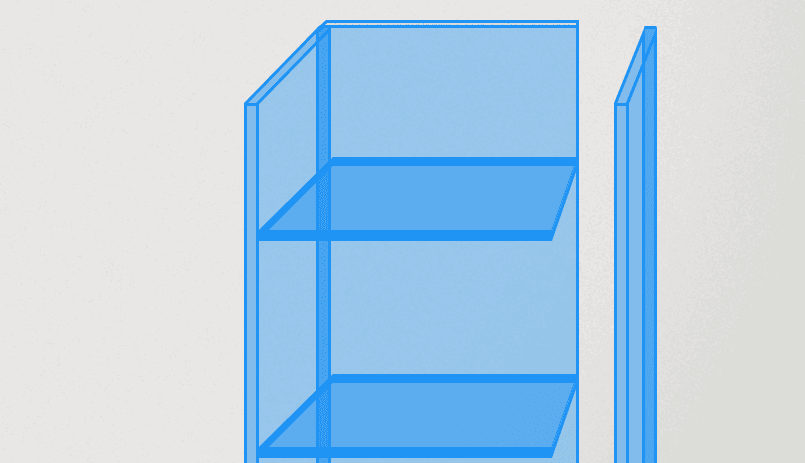
Step 5: Place the second side wall
If the supports are fully glued, the second side wall can be placed. First, you sand all the end faces of the side wall and the supports. Then apply the glue thinly to the end faces and remove the foil on the inside of the second side wall. Now you place the second sidewall against the whole. If you have glued the other parts properly at right angles and level, this sidewall will ‘automatically’ come into place. This side wall can also be fixed with masking tape during drying. After 20 minutes, the last glue joints will have cured and your display case is ready. You can potentially also provide the display with a top or floor plate, but that, of course, depends entirely on your own preferences.
Step 6: Finish the acrylic display case
As a final step, remove the protective film on the supports and the side walls. If there are small scratches in the sheet material, then you can now neatly polish them away. Of course, you want to enjoy your display case for a long time, and therefore you can provide it with a protective layer. You can use Burnus Antistatic cleaner for this. This product cleans the acrylic, leaving it streak-free and ensuring that it attracts less dust. All you have to do now is to put your collection in the display case!