
DIY: acrylic coasters

Our DIY coasters are sure to be a real talking point when you offer your guests a drink. Or tie them up with a pretty bow and you have a highly original birthday gift! An extra bonus: making coasters takes next to no effort. In this quick DIY blog, we’ll explain how to make coasters in just two easy steps.
You’ll need
- Silver acrylic mirror sheet 3 mm
- Sandpaper, 360 grain
The basis for the mirrored coasters
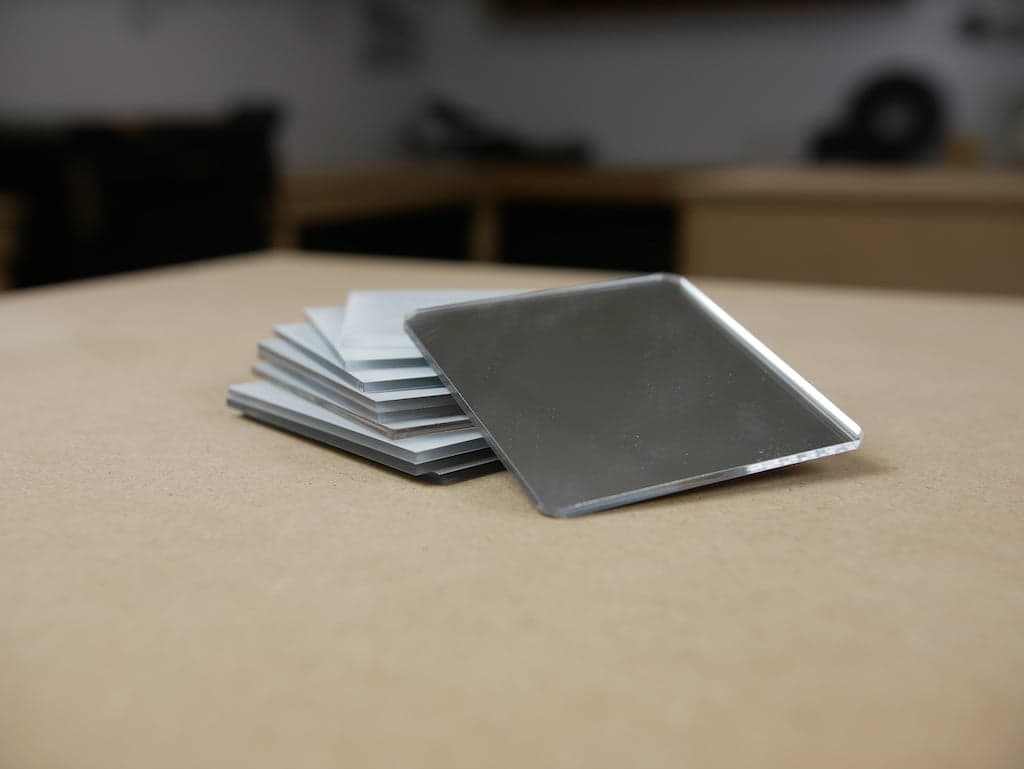
To make the coasters, we’re using mirror acrylic sheet, 3 mm thick. We opted to use an acrylic sheet with a mirror finish in silver colour but you can choose any colour you like. In our webshop, you’ll find an array of different colours to suit every taste, from fluorescent green to opal red.


Step 1: Order the acrylic sheet cut to the size you require
Decide the number of coasters you want to make – 4 or 6 makes a nice number for a gift set – and order the acrylic sheets. Naturally, we’ll cut the coasters for you for free. The coasters in our blog measure 10 x 10 cm.
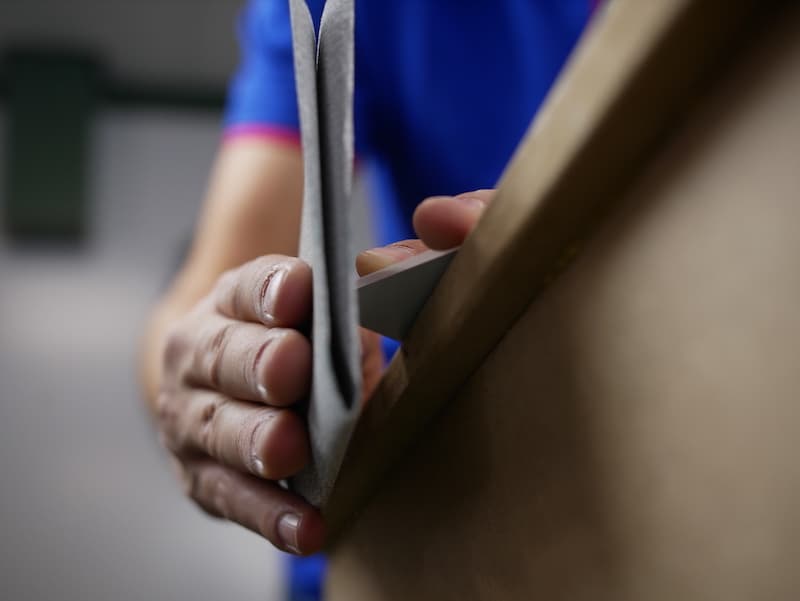
Step 2: Smooth the edges
If you don’t want rounded edges, you can skip this step. Using a piece of grain 360 sandpaper, smooth the sharp edges of your coasters. Go over all the coasters until you’re happy with the finish. Your coasters are now ready to use!

How to keep your coasters looking good
Read our helpful blog with tips for cleaning acrylic.
Tip: need more information about acrylic? Read our blog: What is acrylic used for? and What is acrylic made of?.
Ordering your customised acrylic sheet
If you want to order mirror acrylic or acrylic sheet in a different colour, no problem! You’re sure to find the perfect colour for your coasters in our webshop. If you need more advice on working with acrylic, view our library of blog articles or contact us, we’re always pleased to help.
Other blogs you may be interested in

