How to make a pallet coffee table

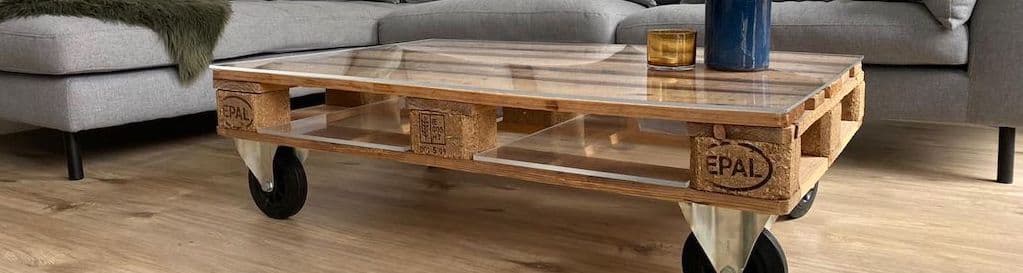
Do you always feel inspired by home decor magazines and DIY programmes? Do you want to get started, but aren’t quite sure how? Does your interior need an eyecatcher, but is your budget very small? If the answer to any of these questions is ‘yes’, then we have a nice DIY project for you: a moveable coffee table with an acrylic table top. Handy for vases, newspapers lying around and very comfortable for putting your feet up, because you deserve a good rest after your efforts. Let’s get started!
Requirements
You only need a small number of supplies for this job. To start with, a Euro pallet or another (smaller) pallet. There is usually a deposit on a Euro pallet, but for that, you get a more solid pallet in return. To make the table mobile, we assemble four wheels. You can choose swivel wheels, making the table more flexible and also easier to roll. Each wheel is mounted with four screws 4 * 25, you need a total of 16 screws and a corresponding drill bit. Of course, a screwdriver also comes in handy. The table top is made of 5-millimetre thick acrylic sheet. You can order this in a large number of colours, but also simply as a transparent sheet. A Euro pallet measures 120 by 80 centimetres. At Plasticsheetshop.co.uk, your acrylic is cut to size for free. We mount the sheet on the pallet with four 4 * 40 screws. In the slots we also place two strips, which are 80 centimetres deep, the width can vary per pallet. You have to measure this yourself. Order the strips 5 millimetres narrower than the slots, then you can absorb any expansion of the materials, and prevent clamping. Tip: you can also make the table top out of four squares, for a colourful effect. You order four acrylic sheets 40 by 60 centimetres in size. Use special acrylic adhesive to glue them to a water-resistant sheet… Do not forget to order the glue. Other requirements include a roll of masking tape, a 5-millimetre HSS drill bit and a countersunk drill bit (or 7 millimetres drill). For gluing, you need rubber/nylon gloves and a well-ventilated area.

Building the pallet coffee table
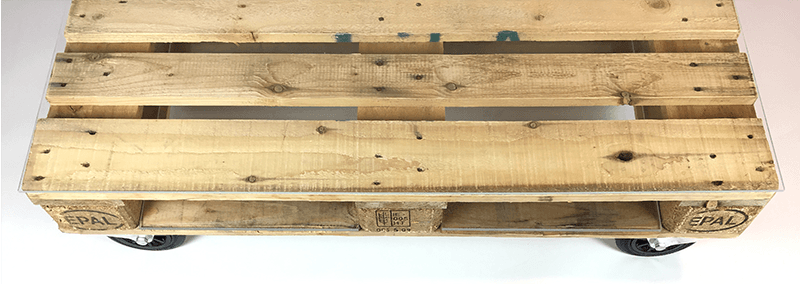
The assembly is a piece of cake; start with mounting the wheels. Make sure that the screws do not pass through the bottom boards, where you place the strips in the slots. If that is the case, use screws that are 5 millimetres shorter. When all four wheels are mounted, place the table on the wheels. Then you position the acrylic table top, the acrylic sheet is mounted on the pallet with four screws. The screws come to the corners of the plate, 20 mm from the edge. Mark the drill holes at all four corners, but first stick a piece of masking tape on the spot where you are going to draw/drill.


Then place the acrylic sheet on the pallet so that it fits perfectly along the edges. Now drill the holes in the acrylic. Do not let the drill turn too fast, a nice continuous chip must be formed. After drilling, you will sink the tops of the drill holes, ensuring that the screw heads lie flat. After this, you can remove the protective foil and mount the acrylic. Make sure that you do not tighten the screws too tightly, otherwise, you run the risk that the sheet will crack from the drilled holes.
Do you want to make the table top from four different panels? Then drill one borehole in each plate, also at 20 millimetres from both edges, then sink the drill holes. Next, place the first sheet on the pallet so that it is nicely aligned with both edges. In the same way, place the other three sheets, in the colour pattern that you want. Now screw the sheets into place, do this securely so that they fit together well. Next, screw the acrylic sheets onto the pallet, so that the screw hole is formed in the wood. This is necessary to fix and position the sheets during gluing. Number the sheets so that they return to the exact same position after disassembling. Unscrew the screws and remove the corresponding acrylic sheets. Remove the protective film from the first and the second sheet. Mount the first sheet on the pallet and ensure correct alignment.

Now put on the protective gloves and apply a glue edge to the acrylic, where it joins the second sheet. Then place the second sheet and screw it on (not too tight). After 20 minutes of waiting, the adhesive will have reacted and you can glue and assemble the third and fourth sheets in the same way. As a finishing touch, place the strips in the slots.
Cleaning and maintaining acrylic
A table must be able to be used intensively, and in practice, a table top is cleaned daily. Do not use abrasive cleaners or abrasive cloths/sponges. To clean acrylic, use a microfibre cloth with a mild household cleaner. If you are smart, treat the table top directly with Burnus Antistatic cleaner. This agent makes the acrylic tabletop antistatic and protects the surface. Do not forget to treat yourself to coffee and pastries after finishing the job!