Making a DIY door canopy

An awning over your front door makes it much appealing to stand and chat with visitors. And when you’re looking for your house keys in the pouring rain, a door awning shelters you from the worst of the weather. Building a DIY awning over your front door yourself is easier than you think. When you use acrylic or polycarbonate and a frame of wood or aluminium, you can construct a door awning that matches the exterior of your house. In this blog, we give you step by step instructions on how to tackle this project.
To make a DIY door canopy, you’ll need:
- Plastic sheet (acrylic or polycarbonate)
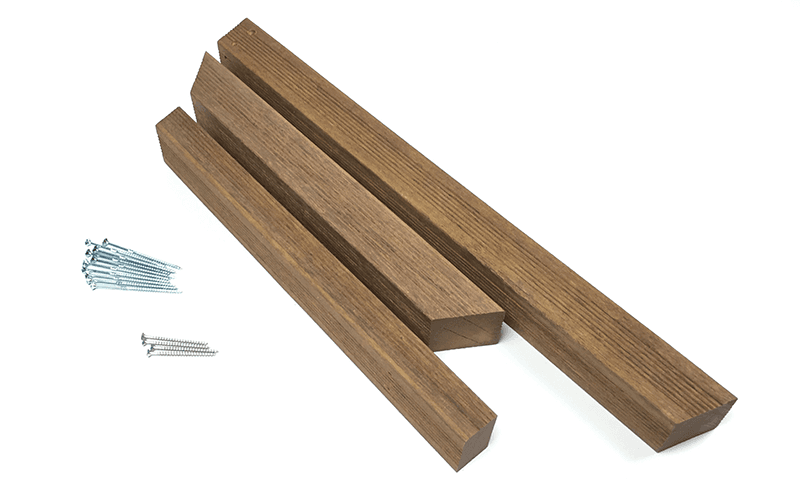
- Timber for the frame (hardwood, preserved wood) 35 x 35 mm.
- Mounting strips and furniture corners
- Flat-head screws 4mm and washers 4mm
- HSS drill 4.5 mm to drill holes in plastic sheet
- HSS drill 3 mm to drill fixing holes
- HSS drill 8.5 mm for hammer plug holes in the frame
- Masonry drill bit 8 mm for hammer plugs
- Circular saw for hardwood
The basics of building a DIY door awning
Before you get started on this project, it’s essential to decide which materials you’re going to use for your frame and canopy. Most types of plastic sheets are ideal for this application. For example, Clear is exceptionally robust and almost unbreakable. Clear and coloured acrylic sheets are also perfect for making a DIY door awning and allow you to match your door canopy to the colour of your front door or the exterior of your property. Of course, how you tackle the project will depend on the material you use for your frame. In our demonstration, we’ll show you how to make a door canopy with a wooden frame.
Constructing of your DIY plastic door awning
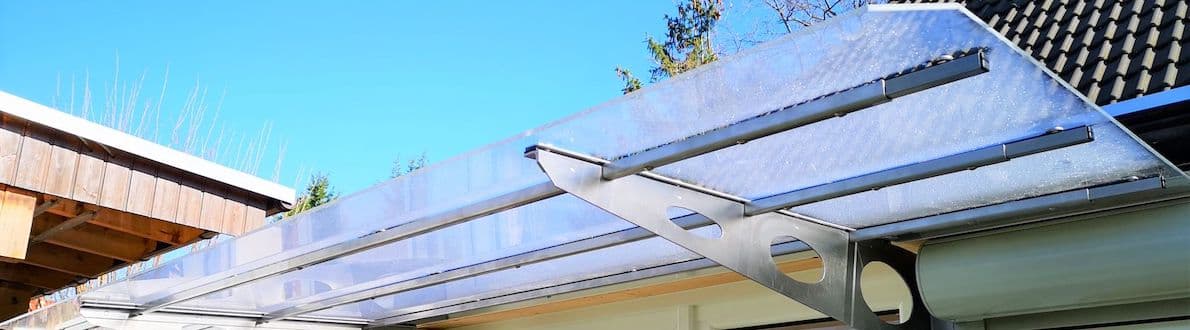
Although plastic sheets are pretty light, the load-bearing construction and the attachment to the wall must be solid. Wind, rain or snow can all place a heavy load on your front door canopy. And ensure that your porch canopy is pitched so that that rainwater can run off. Support your canopy with bracing, angled beams at the corners that provide a sturdy construction.
Step 1: Order the plastic sheets for your porch awning
Once you’ve decided which type of plastic sheet you’re going to use for your door canopy, order it directly from us. We’ll cut all sheets for you in any shape you require.
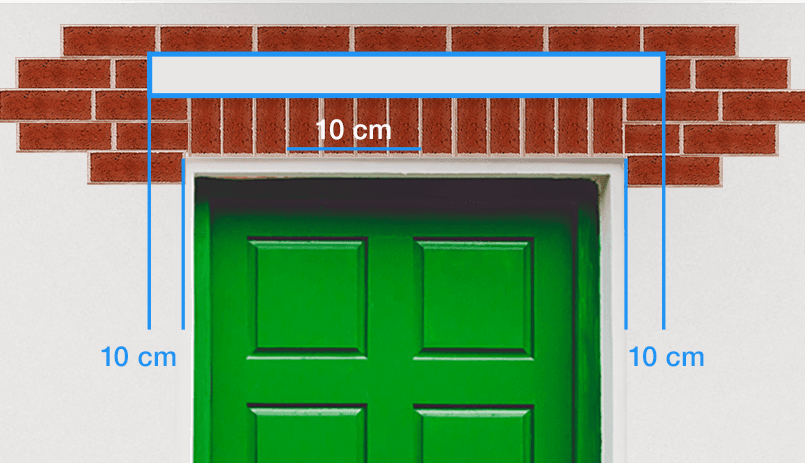
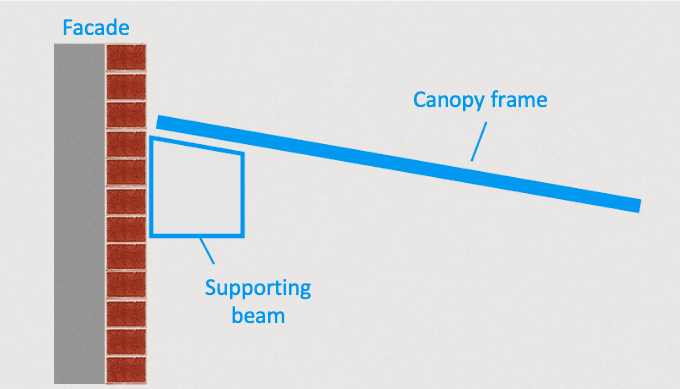
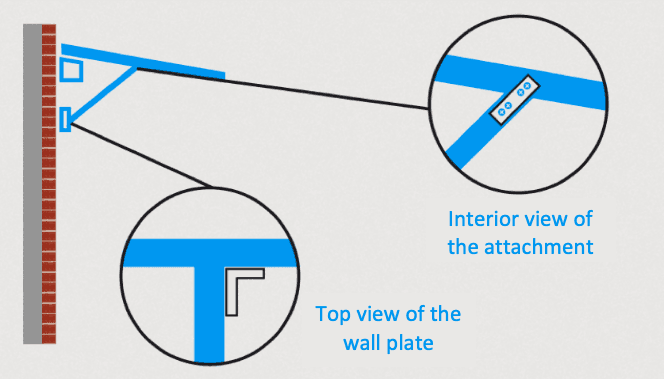
Always make your front door canopy 20 centimetres wider than the door frame so you can attach the awning firmly at the outer corners. The first step in constructing an awning is to fix the joist above the door frame. Attach this support beam to the wall using hammer plugs. The base of the support beam is 10 centimetres above the door frame.
Tip: Mitre the top of the joist so that the canopy framework is supported over the maximum surface area.
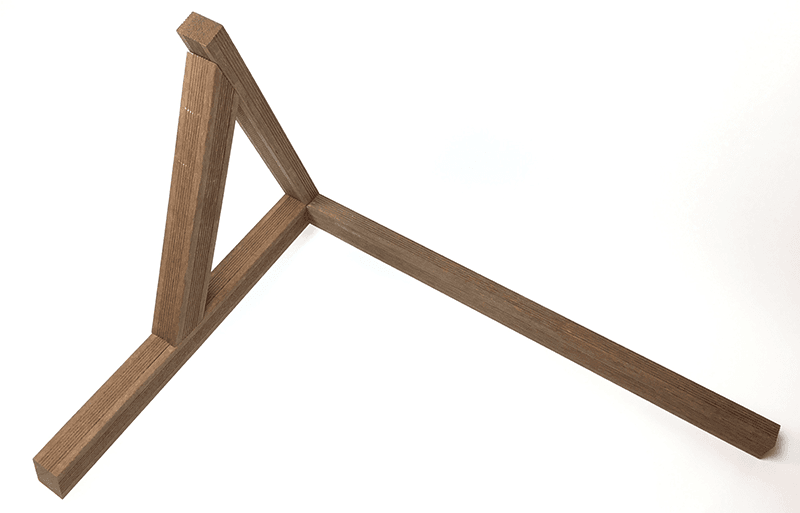
Step 2: Construct the frame for your door canopy
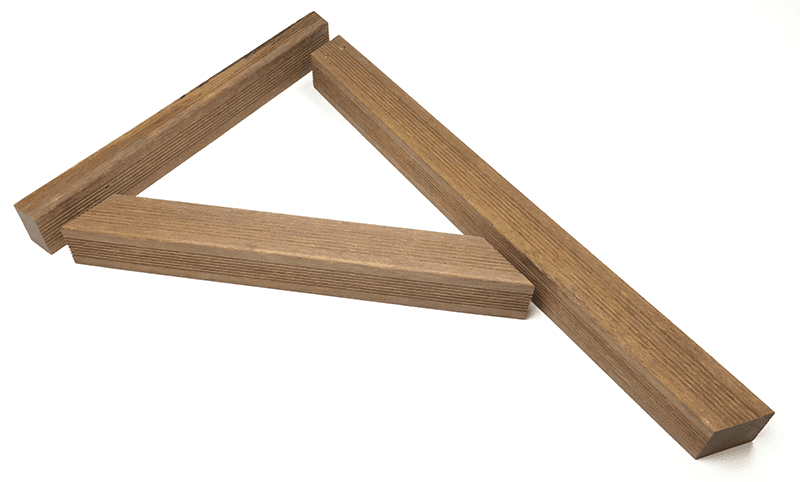
If you’re making the frame for your door awning from wood, use a strong, weather-resistant type of wood, preferably hardwood with the FSC quality mark. Take square battens of at least 35 by 35 mm and saw the three parts that make up the door canopy supports: the wall beams, the supports and the brace. Cut the top of the wall beams with the same mitre as the wall plate.
Important: Pre-drill the holes in the wall beams for attaching to the wall. Fix the wall beams to the wall with hammer plugs. It can be tricky to drill the mounting holes if the beams are already attached.
Use furniture corners and connecting strips, available at your local hardware store, to construct the framework as shown in the photo below:
Step 3: Attach your DIY door canopy to the wall
Mark the drill holes for the impact plugs on the wall and drill the holes. The canopy must withstand weather and wind loads, so we recommend using impact plugs of at least 80 millimetres. Now attach the awning frame to the wall with the hammer plugs.
Step 4: Drill holes in your plastic door awning.
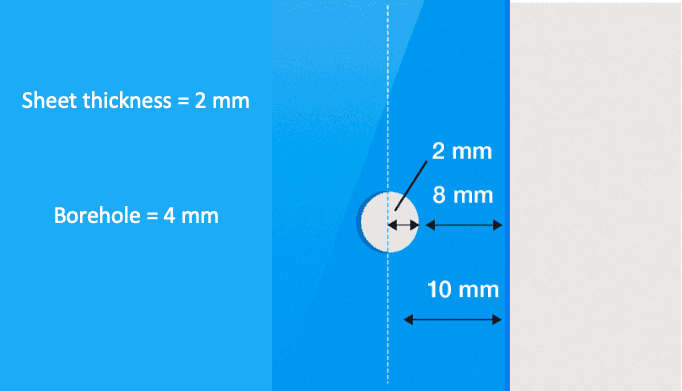
When you’ve completed the framework, attach the plastic sheet. Begin by pre-drilling the fixing holes in the plastic. Place the sheet on a flat surface and stick masking tape around the edge. Leave the protective film on the sheet to prevent scratches. Mark the drill holes, making sure that the minimum distance to the edge is at least twice the thickness of the sheet. So if you’re using a 4 mm thick sheet, the edge of the drill hole must be at least 8 mm from the edge. If you drill a 4mm hole, then draw a line 10 mm from the edge. Mark the holes on the masking tape, 10 cm apart. Now drill all the holes in the plastic sheet. Place the sheet on a wooden surface into which you can let the drill run. Leave the masking tape and protective foil in place!
Step 5: Attach the plastic sheet to the canopy frame
First, drill the holes in the framework, then position the plastic sheet on top of it. Hold the sheet in place on the frame using screw clamps. Then using a smaller drill bit, drill all the holes on the front of the framework. Use a drill bit 1 mm smaller than the drilled holes in the plastic sheet. To stop any rattling, apply foam tape between the plastic sheet and the frame. Now screw the plastic sheet onto the framework with flat head screws and washers. If you’re not careful, countersunk screw heads can crack the plastic sheet when you tighten them, so start by screwing the top edge onto the wall plate. Then screw the plastic sheet onto the left wall bracket and then the right one.
Step 6: Seal the connection with the wall
To stop rain seeping between the frame and the wall, fill the gap using silicone sealant or acrylic sealant for exterior use.
Cleaning your DIY acrylic door awning
We recommend cleaning your door canopy regularly with an anti-static plastic cleaner. If the plastic’s very dirty, first use plenty of water with one drop of cleaning agent. That generous amount of water is essential, as is rinsing the cloth frequently. So you won’t be moving the dirt back and forth over the sheet, which can scratch it. When the plastic’s completely clean, let it air dry. Don’t rub it dry because this will also cause scratches. If the plastic’s not too dirty, but you’d like to protect it from dirt, skip the soapy water and apply the anti-static cleaner directly.
More ideas for making a DIY acrylic awning
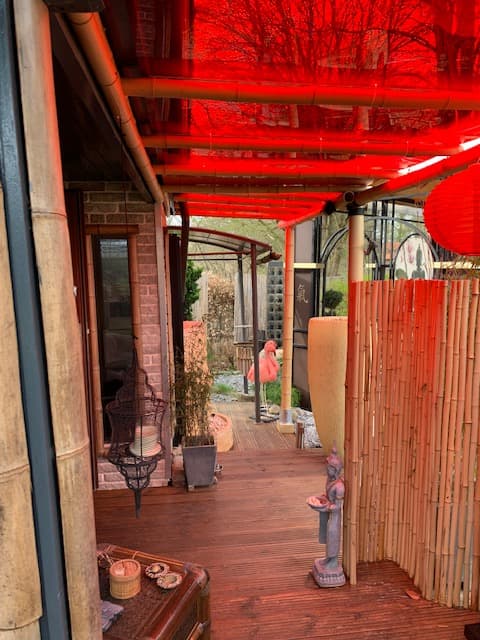
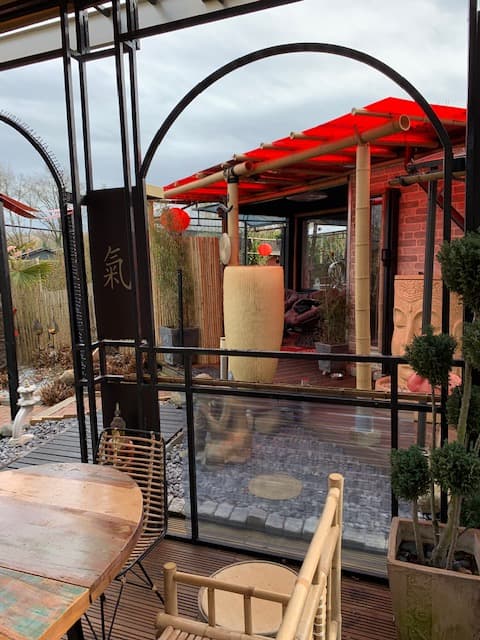
Of course, there are endless ways of making a door awning, as you can see in our customers’ pictures below. For example, you can make your door awning from clear acrylic and stainless steel or choose red tinted acrylic with a bamboo frame. A side return canopy made with grey-tinted acrylic with a frame of galvanised steel tubes gives a very stylish result – are you inspired to make one like this?
Ordering plastic sheet for a DIY door canopy
Are you planning to make a DIY porch canopy? You’ll find moulded acrylic sheet and polycarbonate in a range of thicknesses and colours in our webshop. We cut all the sheets for you in any shape you need. If you’re not sure about the thickness, please consult our free thickness calculator or contact us for free advice.