Step 1: Make a design for your turtle enclosure
Before you get started on your homemade turtle enclosure, it’s essential to consider what exactly you want. Ideally, you want to construct a home for your pets that’s easy to maintain. And you need to determine the box turtle enclosure size. In our example, we’re using an old planter measuring 120 cm x 180 cm.
Step 2: Order acrylic sheet or polycarbonate for your outdoor baby turtle enclosure
Once you’ve planned your outdoor box turtle enclosure design, the next step is to order the required clear acrylic sheet or polycarbonate with the correct measurements. Then, we’ll cut the sheets to size for you in any shape you need. Once you’ve assembled the plastic sheets and other materials, you can start constructing your turtle enclosure.
Step 3: Building your turtle enclosure
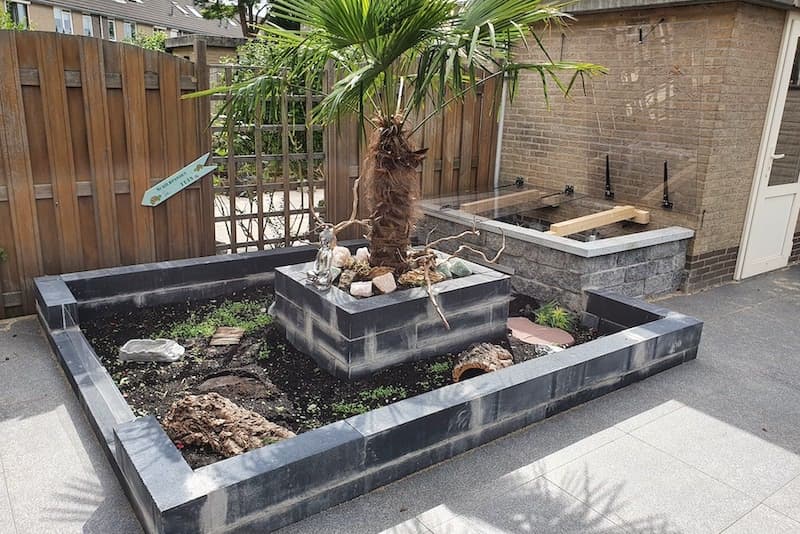
For the turtle enclosure shown in the photo below, we used two 8mm thick clear polycarbonate sheets to create ‘lids’ on an old raised bed. Are you also planning to make a tortoise enclosure from a raised bed or cold frame? Then it’s essential to secure the plastic sheets properly with hinges. Doing this means your tortoises will stay dry, and the warmth won’t escape. To allow the turtles to go outside when they want, we have removed a stone from the side of the raised bed. An outdoor enclosure is attached to this with the help of stone blocks. So you can admire your tortoises from a distance, you can opt to add ‘windows’ made of 3 mm thick acrylic sheet in the stone sides. It’s very easy to do this by creating a slot in the stone blocks. Finally, seal everything for a neat finish.