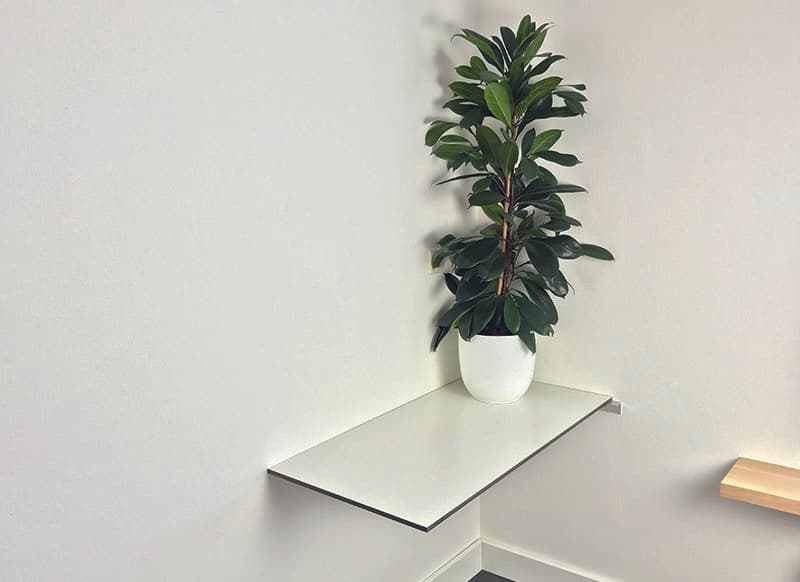
How to make a table / desk from HPL

It’s possible to buy many types of desk, but only rarely is a desk custom-made. The better types of desks can be adjusted and customised, but no one offers a custom desktop, which is the most important part of a good desk. In this DIY blog, we explain how to build a desk yourself, and in particular about how to make an HPL desktop. HPL is an ideal material for a desktop, but how do you attach it invisibly to a desk frame? Read on to find out…
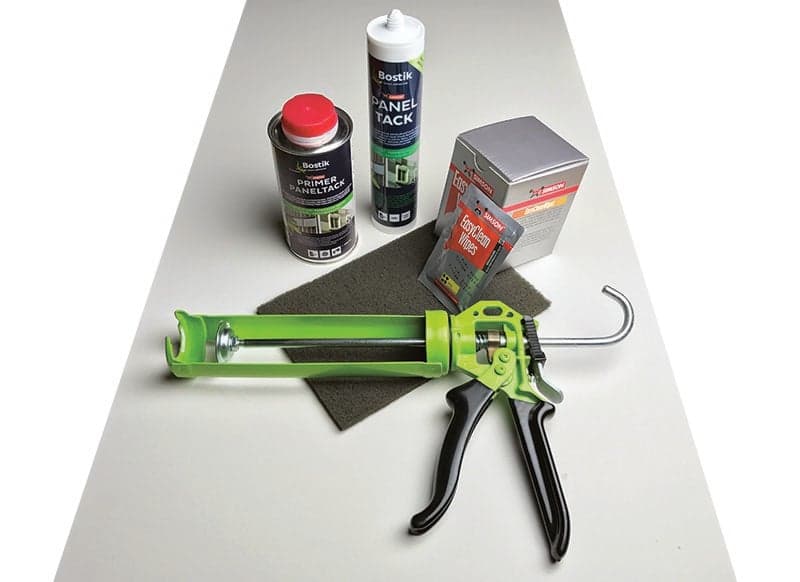
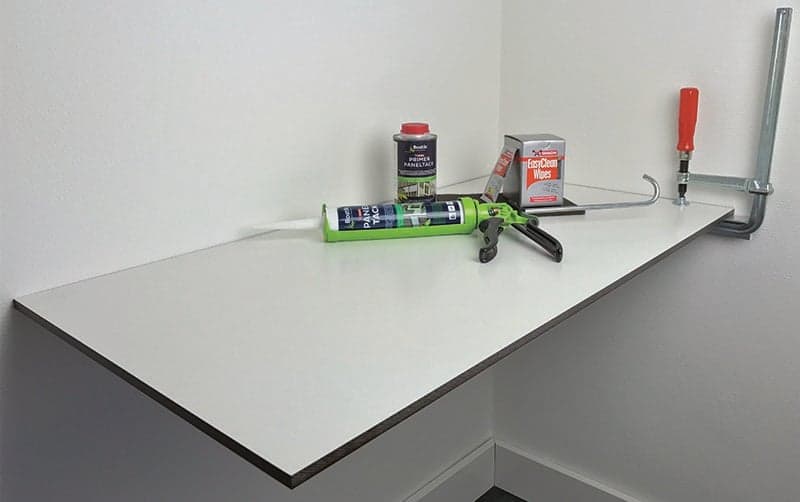
You’ll need the following materials:
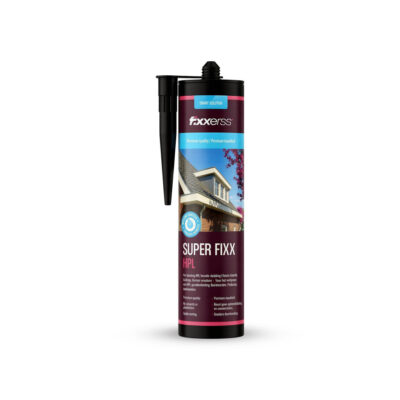
- Fixxerss HPL Super Fixx – HPL/Trespa adhesive
- Abrasive wool, such as Scotchbrite •
- Fixxerss Multi-Primer Professional
- Kit gun for kit cartridges
Choose your design
In this blog, we particularly want to explain how you can make an HPL desktop and mount it invisibly. What the rest of your desk looks like, you can decide for yourself; there are many inspiring designs on the internet. You only have to take into account that you have to screw a number of screws horizontally in a panel to attach the desktop, so it’s important that the frame is made of a screwable material, such as wood or MDF.
Working with HPL
HPL is the acronym for High-Pressure Laminate and is also commonly called Trespa. While Trespa is the pioneer in the field of HPL materials, it’s certainly not the only manufacturer. Plastic Sheet Shop, for example, offers its own brand HPL sheets. HPL is an ideal material: it’s tough, hard and extremely durable. You can choose from various colours, but the most important consideration is the sheet thickness. A sheet thickness of at least 15 millimetres is required for a desktop. HPL is known as a material that’s hard to work, but this is incorrect. With good do-it-yourself tools, it is easy to machine, and as always: good preparation is half the work. Remember, all orders at Plastic Sheet Shop are cut to size for free!


If you want to saw HPL yourself, you’ll need a jigsaw with variable speed and an HSS saw with fine teeth. You can’t mark the saw line directly on the HPL, but rather on a strip of masking tape. Stick the tape on both the top and bottom, this helps to prevent the surface from ‘breaking out’. Ensure that the HPL plate is properly supported during cutting: support the plate as close as possible to the cutting line so that the plate does not vibrate during sawing.
Set the jigsaw at medium to high speed and insert the saw into the material at this speed. Let the saw do the work and cut through the sheet. Make sure that the sole of the jigsaw is good and flat on the plate surface. More tips on sawing Trespa can be found in this DIY blog. Of course, you can still plane the edges of the Trespa for a nice, smooth finish.
Mounting the HPL desktop – a combination of adhesives and screws
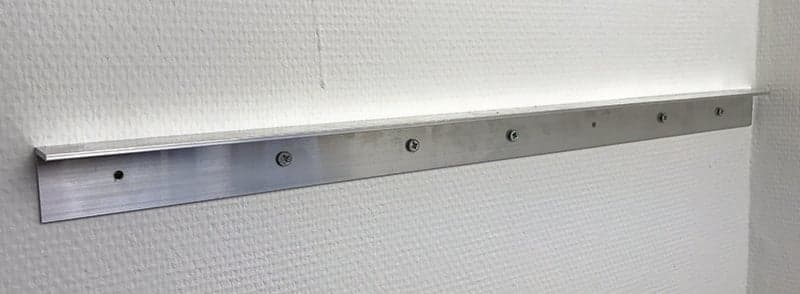
It would be a shame to place drill holes and screws in the HPL worktop so that’s why we will mount the worktop invisibly on the frame. We do this with an aluminium corner line that is glued to the underside of the worktop. These are available at every hardware store, we advise you to choose a 30 * 30 millimetres version. In the vertical edge of the corner line, there are screw holes through which it is screwed to the frame. In fact, the corner line does not actually support the desktop, it only stops it from sliding.
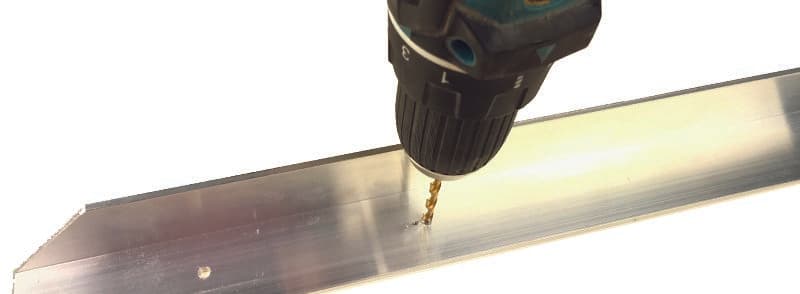
How long does your corner line have to be? That depends on the part of the frame to which it’s screwed. Suppose you want to screw it against the sidewall of a desk cabinet, and the box is 50 centimetres deep, then you take a 50-centimetre long line. You start by drilling a number of 5-millimetre holes in the corner line, preferably every 10 centimetres.
Then using 4-millimetre screws, mount the corner line against the side wall, making sure that the top edge (the flat edge) of the corner line is level with the rest of the desk frame. In the same way, mount a second angle line on the opposite side wall.
Gluing the HPL to the corner line
After both corners are mounted on the frame, place the worktop on the frame. You can move the worksheet accurately until it is perfectly in place. TIP: just sit down to check that the desktop isn’t too far forward. If the desktop is positioned as desired, mark the position of the corner lines at the bottom with a waterproof marker on the underside of the desktop.
Sand the marked parts (where the corner lines appear on the sheet) with the abrasive wool. Then clean the sanded area with the Easy Clean Wipes. Do this also with the top of the corner lines: first sand them and then clean. After the surfaces of the sheet and the metal are dry, apply the PanelTack Primer. You do this by putting a little primer on a clean cloth and applying it to the material. After 10 minutes, the primer will be dry.
The next step is to apply the PanelTack adhesive: apply a small amount of glue in a zigzag pattern to the corner lines. Allow the adhesive to react with the substrate for 2 minutes and then place the HPL desktop on the frame. Help from a second person is very useful here. Position the desktop so that the corner lines fall within the marked lines. If the desktop is well positioned, it must then be fixed for 2 hours.
You hold it in place using glue clamps. Place a wooden slat on top of the sheet so that the glue clamp does not press into the surface. Below, you place the glue clamp against the corner line. Tighten the glue clamps (at least 4) by hand. The HPL sheet must not deform during tightening. Leave the sheet clamped for 2 hours so that the PanelTack glue can dry thoroughly. After this, the glue connection is strong enough to use the desk.
General tips
Finally, some general tips: To create a stronger connection, you can use multiple angles and glue connections. We advise you to use a minimum of 4. Do you want a very solid desk? Then a back wall is essential as this will give you a desk with the most strength. You can choose to make the back wall in a beautiful, contrasting colour HPL. For this, you don’t have to use the same sheet thickness as the desktop, but we recommend a minimum sheet thickness of 6 millimetres for a back wall. You don’t have to glue the back wall, but simply screw it against the frame. More tips on working with HPL can be found in this DIY blog.