DIY: Making an outdoor toy box

The most important thing about an outdoor toy box is that it must be watertight. We recommend using HPL which is water-resistant. Choose your favourite colour and you have an attractive feature for the garden. Even better, if you use HPL for your toy box, it will keep its good looks for many years. In this DIY blog, you’ll find step by step instructions on making a plastic toy box that also doubles up as a useful bench.
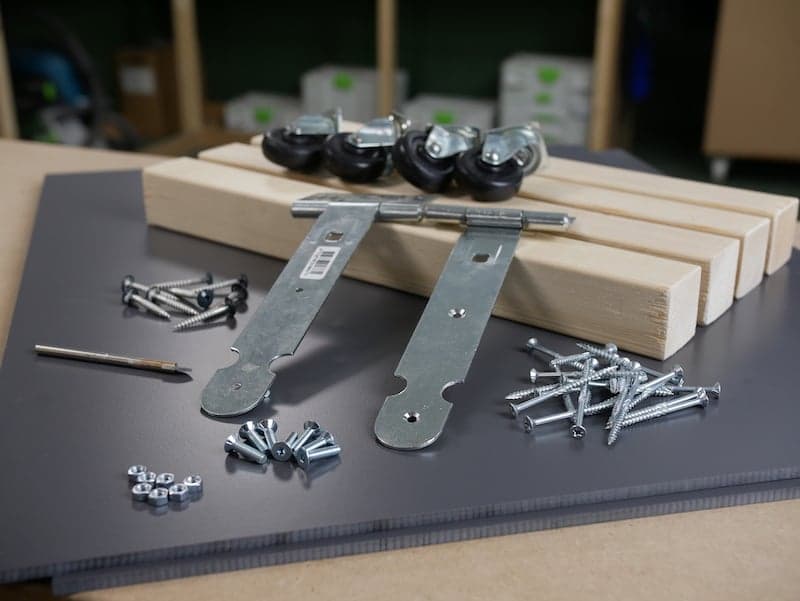
You’ll need:
- HPL panels 6 x 6 mm thick in a colour of your choice
- 12 timber posts (4 upright, 4 longitudinal, 4 crosspieces)
- Drilling machine
- Chipboard
- HPL screws
- HPL drill for High Pressure Laminate
- 2 hinges + 6 bolts
- Castors (optional)
The basis of the outdoor toy box
The toy container we’re going to make is 100 cm wide, 50 cm deep and 60 cm high. We’re using lengths of 50 x 50 mm deal for the frame. We’re going to make the plastic toybox from 6mm thick HPL panels in anthracite colour.
The measurements of the HPL panels:
- Front and back: 2 x HPL 6mm panels in anthracite 101.2 x 60 cm
- Sides: 2 x HPL 6mm panels in anthracite 50 x 60 cm
- Base: 1 HPL 6mm panel in anthracite 50 x 100 cm
- Top: 1 HPL 6mm panel in anthracite 104 x 54 cm
Step 1: Decide the size of your garden toy box
Before you start, it is important to first determine the size of your toy box. Bear in mind that the front and back HPL panels should be 12 mm longer (twice the thickness of the sides). Make the top of the toybox 2 cm longer on 4 sides to prevent any water from seeping point the box.
Step 2: Make the base frame
For the base frame of your toy box, you’ll need lengths of timber (50 x 50 mm). Saw 4 longitudinal beams of 100 cm, 4 crosspieces of 40 cm and 4 uprights of 50 cm. Now assemble the lower and upper frame and screw it together chipboard screws. Take the uprights and mount them between the 2 frames. The basis for your toy box is now ready!
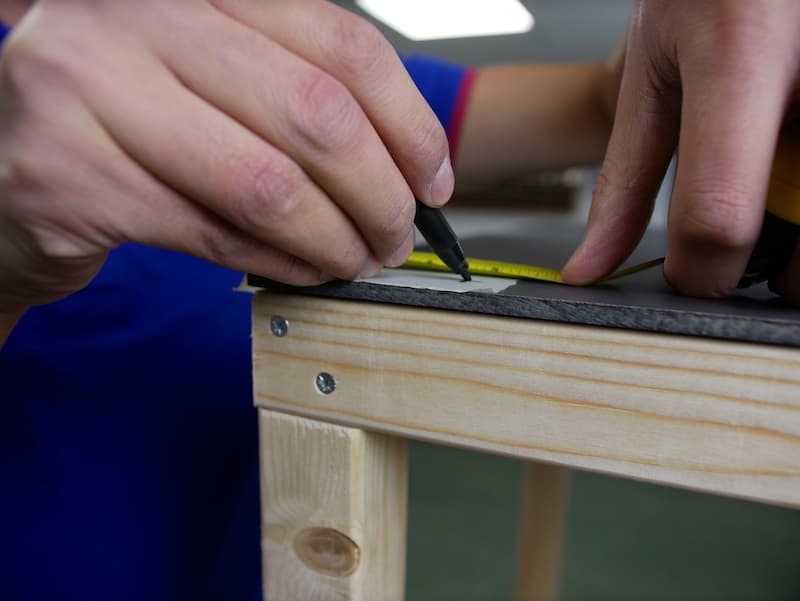
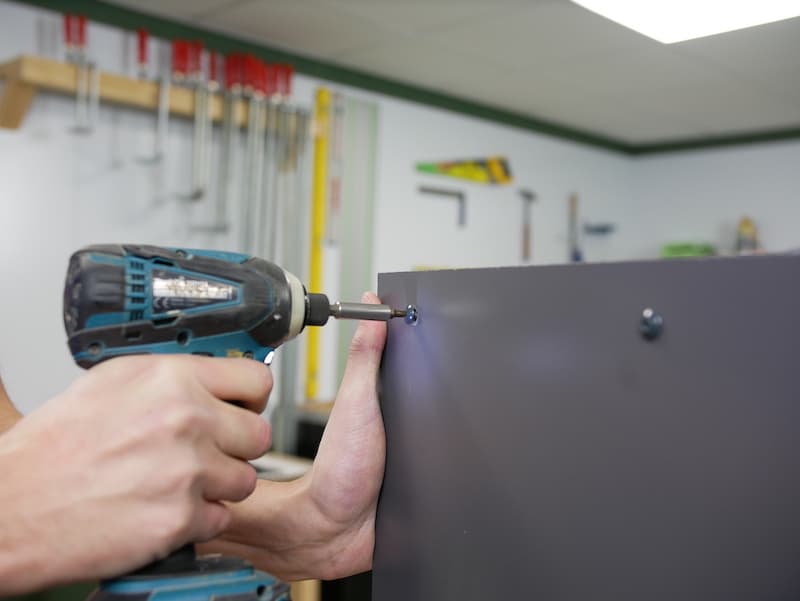
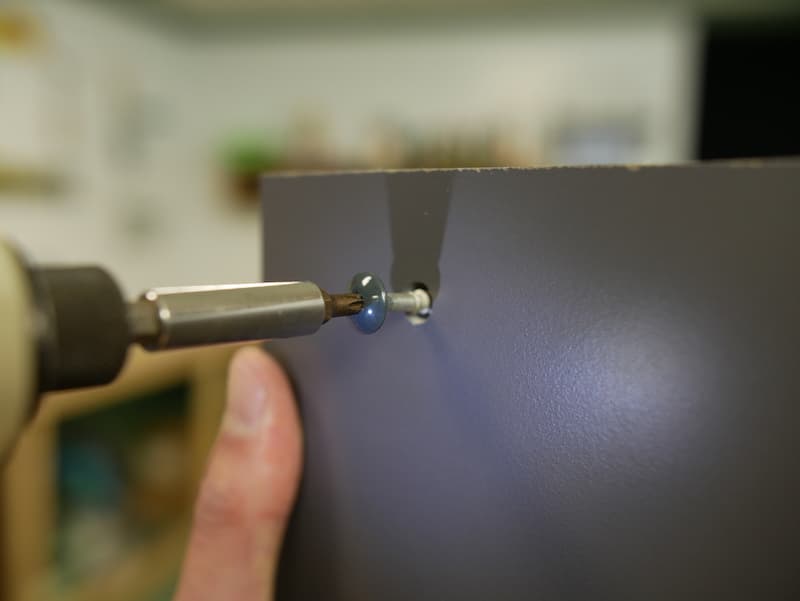
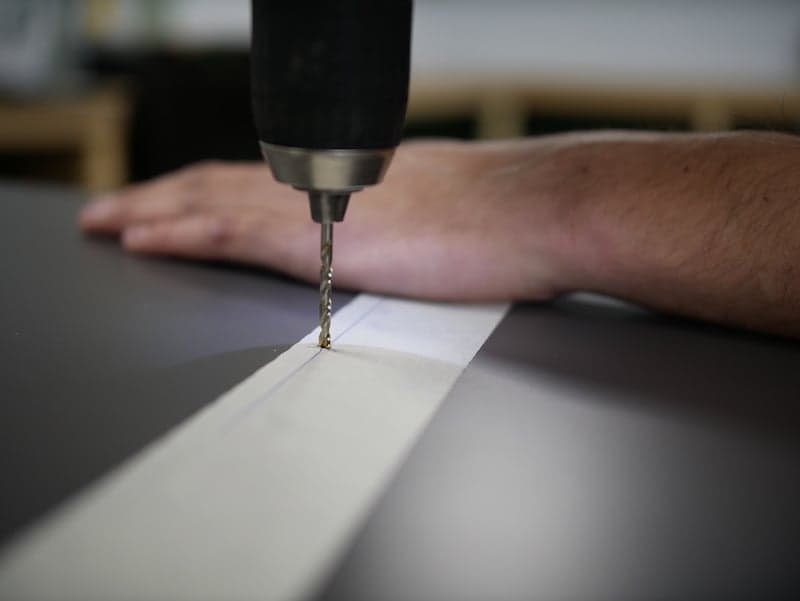
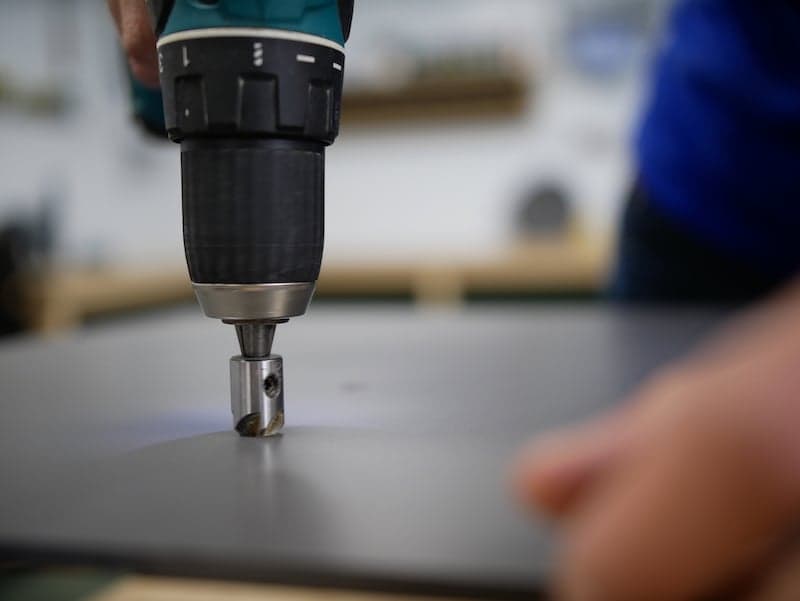
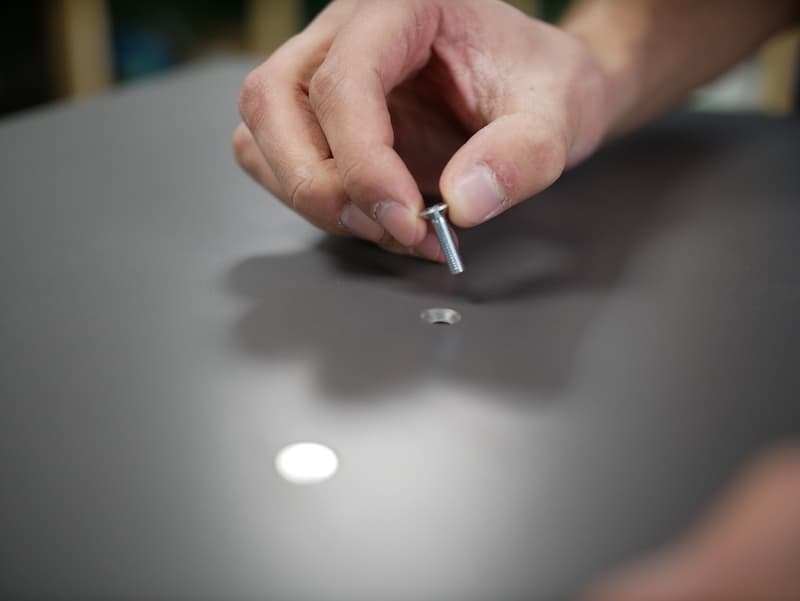
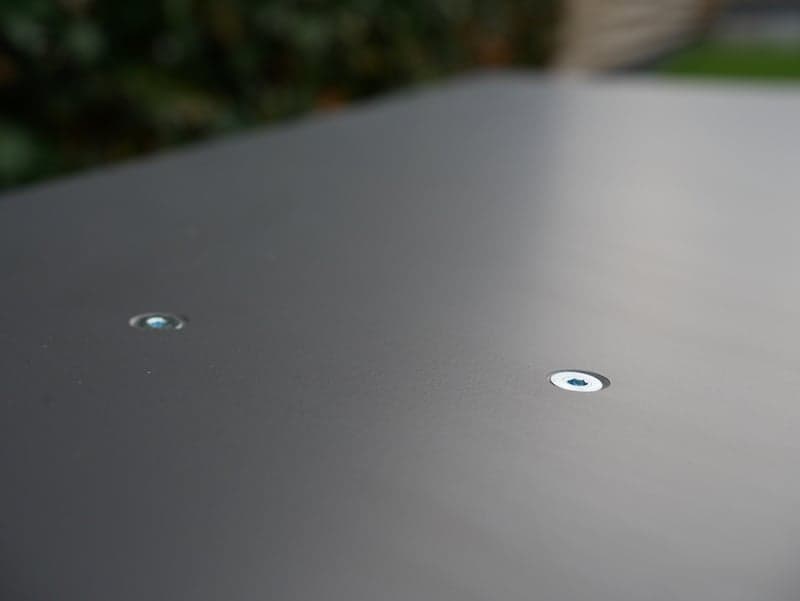
Step 3: Mark out the drill holes and fix the HPL screws
Mark out the drill holes for attaching the HPL sheets. Drill the holes using an HPL drill and screw them every 25-30 cm using matching HPL screws. Because we have chosen HPL in anthracite, anthracite, we’re using anthracite HPL screws.
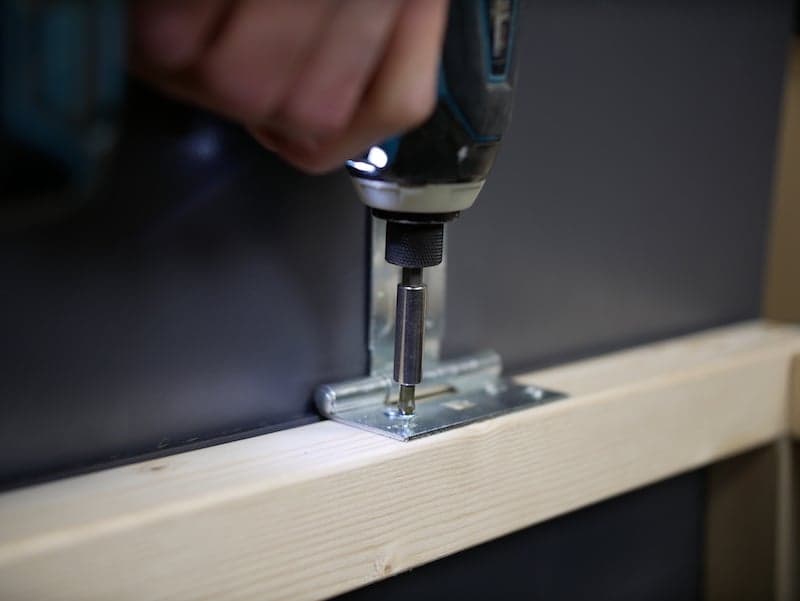
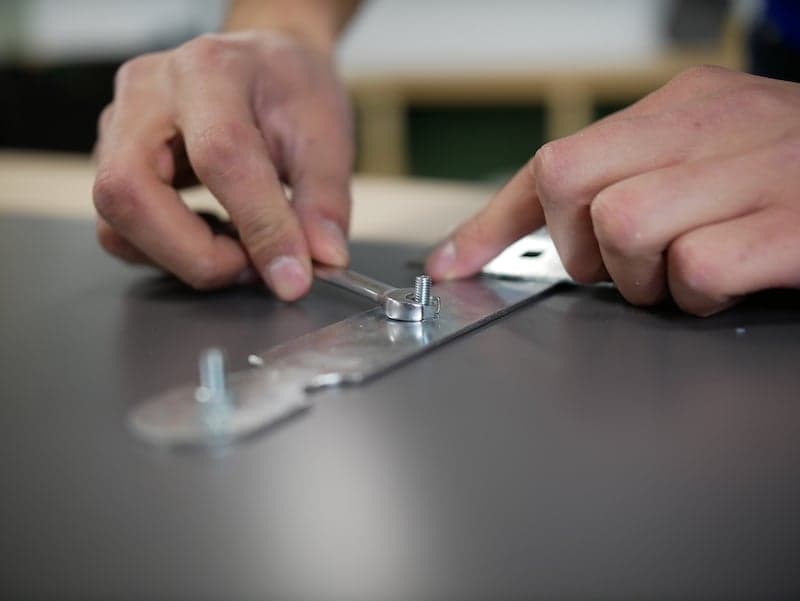
Step 4: Attach the hinges to your toy box
Using a rule, mark the position of the hinges then attach them to your frame. Next, measure the holes of your hinges so you know exactly where to drill the holes in the top panel to attach your hinges. Countersink the screws in your top panel using a countersink. This is so that the screws don’t stick up and you can also use the toybox as a bench.
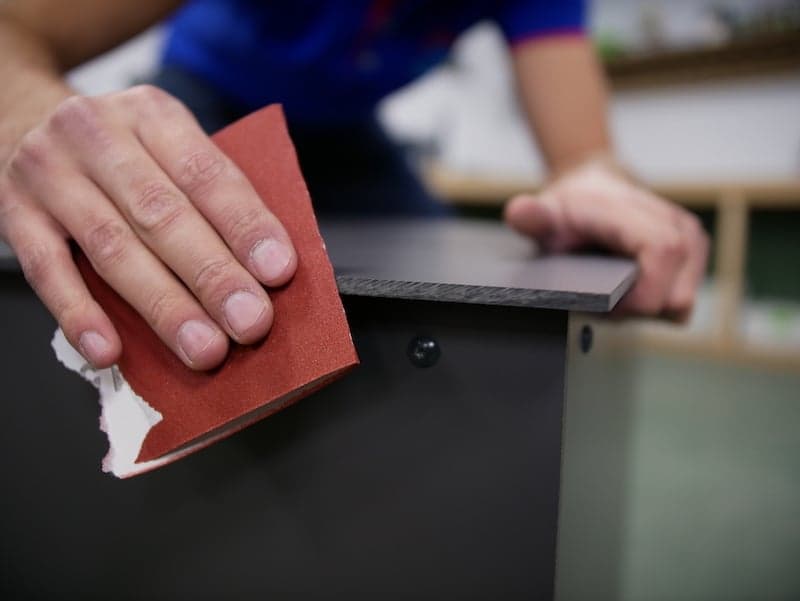
Step 5: Finishing your DIY outdoor toy box
To ensure that your toy box is completely safe, we recommend rounding off the edges with sandpaper or a router. Your outdoor toy box is now ready to use but if you’d like to make a toybox on wheels, carry on to step 6.
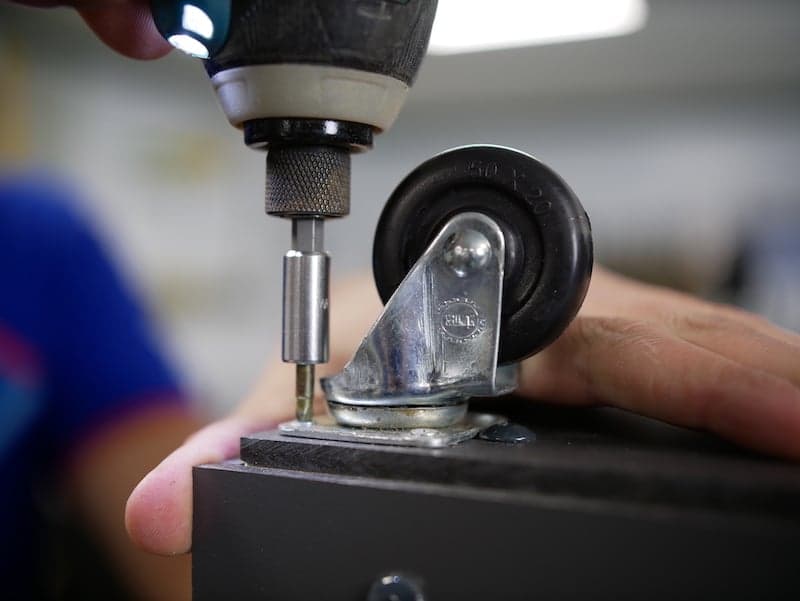
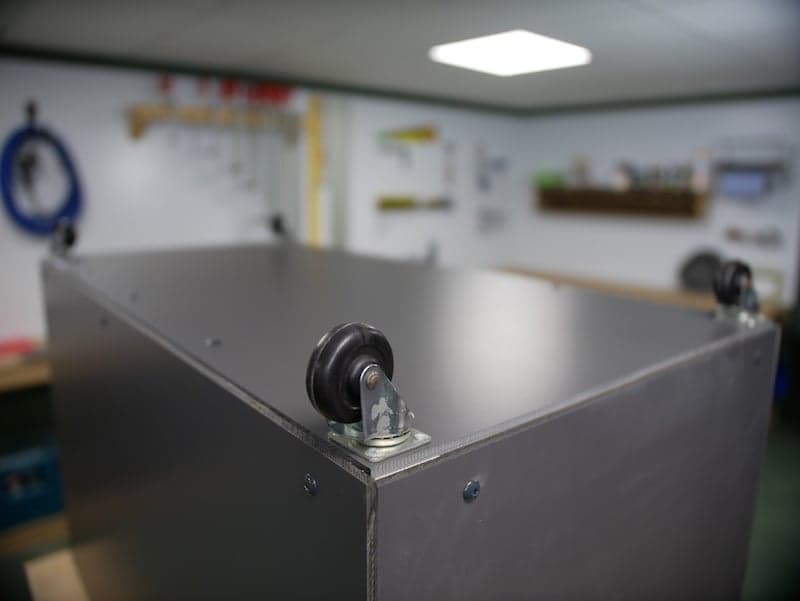
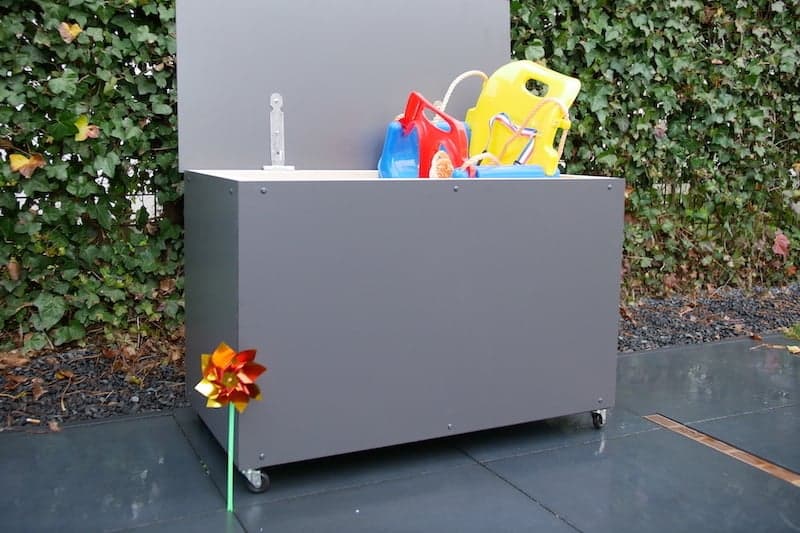
Step 6 (optional): Attaching wheels to your toy box
Position 4 castors at the bottom, as you can see in the pictures above. By attaching wheels under the toy box, it will be easy to move wherever you want it, so you can use it as a garden bench.

Buy HPL panels for your plastic toy storage box
Have we inspired you to make your own outdoor toy box? You’ll find a wide range of colours In our webshop at Plasticsheetshop.co.uk and we’ll saw the panels for you for free.


More DIY ideas
View our blog for more fun DIYs using HPL. If you have questions about this project or about our products, please contact us.
Other blogs you may be interested in: