Make a Raspberry Pi case

What materials do you need?
The basic material is an acrylic sheet 6 millimetres thick, 200 millimetres wide and 150 millimetres long. It is important to opt for cast acrylic rather than extruded acrylic, which can break during machining. The housing is screwed together with 4 M4 bolts of 35 millimetres long, 4 M4 nuts and 4-8 washers M4. The best thing is to choose bolts with a flattened head. We use a piece of aluminium tube around 8 millimetres for the spacers, a length of 30 centimetres is enough, but most DIY stores sell this tube per metre. On the underside of the housing are 4 rubber/silicone caps that serve as feet. Consider, for example, Tesa Protect pads.

Which tools do you need?
A ruler, a square bracket, a vice, a marking pen, a roller of masking tape, a drill (preferably a column drill bit), a saw (preferably a band saw), an HSS drill 5 millimetres, a countersink (sovereign drill), sandpaper grit 150, a fine metal file, Acrifix acrylic glue, rubber gloves and possibly a Propane burner (not a Butane burner).
Step 1: Mark and saw
The housing consists of six parts: the front and back, both of which are 100 by 75 millimetres, two pieces 8 by 30 millimetres, one piece 8 by 15 millimetres and a one piece 8 by 10 millimetres. This is marked out as follows on the protective film of the acrylic (during cutting and drilling you must leave the foil on both sides!)
Next, cut out the pieces – if you use a band saw you should not set the cutting speed of the saw blade too high. Otherwise, the material may melt, so saw quietly and gently pass the material along the saw. And of course, do not forget to cut as straight as possible! After sawing, sand the rough edges with the sandpaper.
Step 2: Marking holes and drilling
Holes are drilled at the corners of the front and back. This is an accurate job, however, good preparation is half the work. That is why you should first stick a strip of masking tape along the edges on both sides of the sheets. This helps to prevent the drill from slipping and the hole breaking. Mark the drill holes on the masking tape 5 millimetres from both edges.
After you have marked the holes in both pieces at all angles, you can drill the holes. Make sure you have a piece of wood underneath the acrylic sheet during drilling that the drill can run into. Using the 5-millimetre HSS drill bit, drill all the holes in the pieces.
If you have a countersink at your disposal, you can galvanize the drill holes and use flattened bolt heads. These heads then lie flush with the surface of the material.
Step 3: Finishing corners and edges
We are going for a smooth look, and that is why we are going to finish the corners neatly. You do this with the fine metal file. You should file a nice curve at all the corners and then use the sandpaper to sand down the file and saw marks as smoothly as possible. If you want to work accurately, it is very advisable to clamp the acrylic sheet in a vice. To prevent the acrylic from getting damaged, first wrap the pieces in a cloth.
Step 4: Flame polishing the edges
This step is optional, so if you do not have a propane burner, you can skip this step. After grinding the corners and edges, you will see that they are matt. By polishing the edges, you get them completely smooth and transparent again. Flash polishing is a relatively simple process, but it does require some practice. Therefore, first practice on a scrap piece. Do not forget to remove the protective film before flame polishing!
Light the burner and adjust the flame so that a stable and not too large flame is formed. The format must – as the name suggests – correspond to the end of a pencil. In the case of flame polishing, the cone of the flame (the brightly lit core) must not touch the acrylic. Aim the flame at the edge and move the burner in one gentle movement (certainly not too slowly) along the edge. The acrylic melts and will then set to a crystal-clear surface.
Step 5: Sawing spacers
Time for a steady hand: sawing the spacers. From the aluminium tube, saw 4 spacers 20 millimetres long. Tip: draw the saw line all around on masking tape. Then clamp the tube (not too tightly) in the vice and cut off the four spacers. Saw as square as possible!
After sawing, remove the masking tape and file or sand the cut edge smoothly.
Step 6: Place and glue positioning blocks
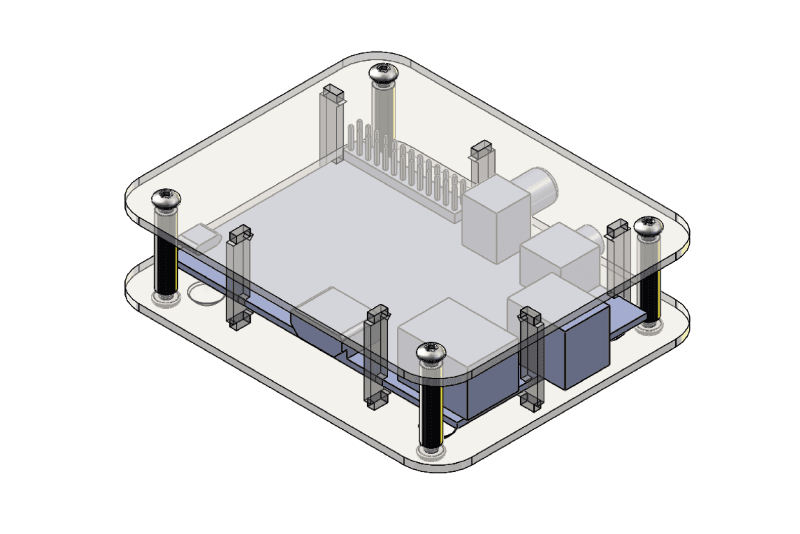
The motherboard of the Raspberry is sandwiched between the positioning blocks. These are the four short strips of acrylic that you cut out earlier. You saw these from the edge of the plate, which means that one side of all four positioning blocks is nice and smooth (the edge of the original plate). Those sides of the blocks are glued to the bottom plate.
But where do the positioning blocks sit? That depends on the version of the Raspberry, with the different variants the connections, USB and card slots are in different positions. In this step, you have to decide for yourself what the best position is, in any case, the two long blocks (those of 30 millimetres) will be at the side of the motherboard.
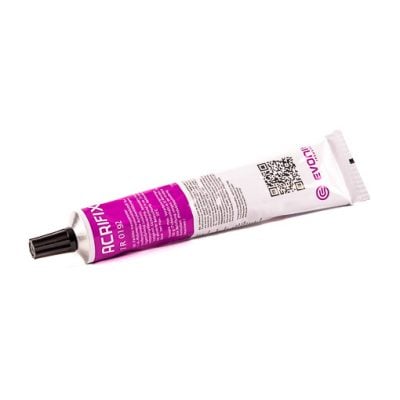
Place your Raspberry as neatly as possible on the bottom sheet, this is the piece in which the (flattened) bolt heads sit. You should have already removed the protective film if all goes well. Now it is briefly puzzling to work out the best position of the positioning blocks so that the connections remain free. Once you have found the ideal position, you can glue the blocks. Put on rubber gloves first and make sure your workspace is well ventilated. Remove all remaining protective film (and masking tape). Before you open the tube of Acrifix, it is helpful to know that Acrifix is a very thin glue, so try to exert as little pressure as possible on the tube when opening.
Then apply a thin layer of Acrifix to the first block (a long one that comes to the side of the Raspberry) and place it in the desired position. Repeat for a short positioning block on the short side of the Raspberry. Allow these two blocks to stand for 20 minutes, for the Acrifix to react and the two positioning blocks are then fixed firmly. Glue the other two positioning blocks in the same way.
Step 7: Build up and finish
Finally, we will build the housing. From the bottom, you place the four M4 bolts. If you are not using flattened bolt heads, place a washer under each bolt/screw head. Place the underside with the four bolts on your work table. Now place the four spacers over the bolts and position the Raspberry between the positioning blocks. Next, position the top, the four washers and turn the four nuts in place. Do not turn the nuts too tight, otherwise, the acrylic may crack around the hole. Finally, stick the four rubber/silicone feet on the bottom. This keeps your Raspberry Pi housing stable on any surface.