Rikus has ingeniously crafted an enclosure for his 3D printer using acrylic and two IKEA Lack tables. His goal? To create the perfect environment for printing. The setup maintains a stable temperature, mitigates unpleasant odours, and even dampens the noise of the printer. With this enclosure, your 3D prints will only get better!
The Project
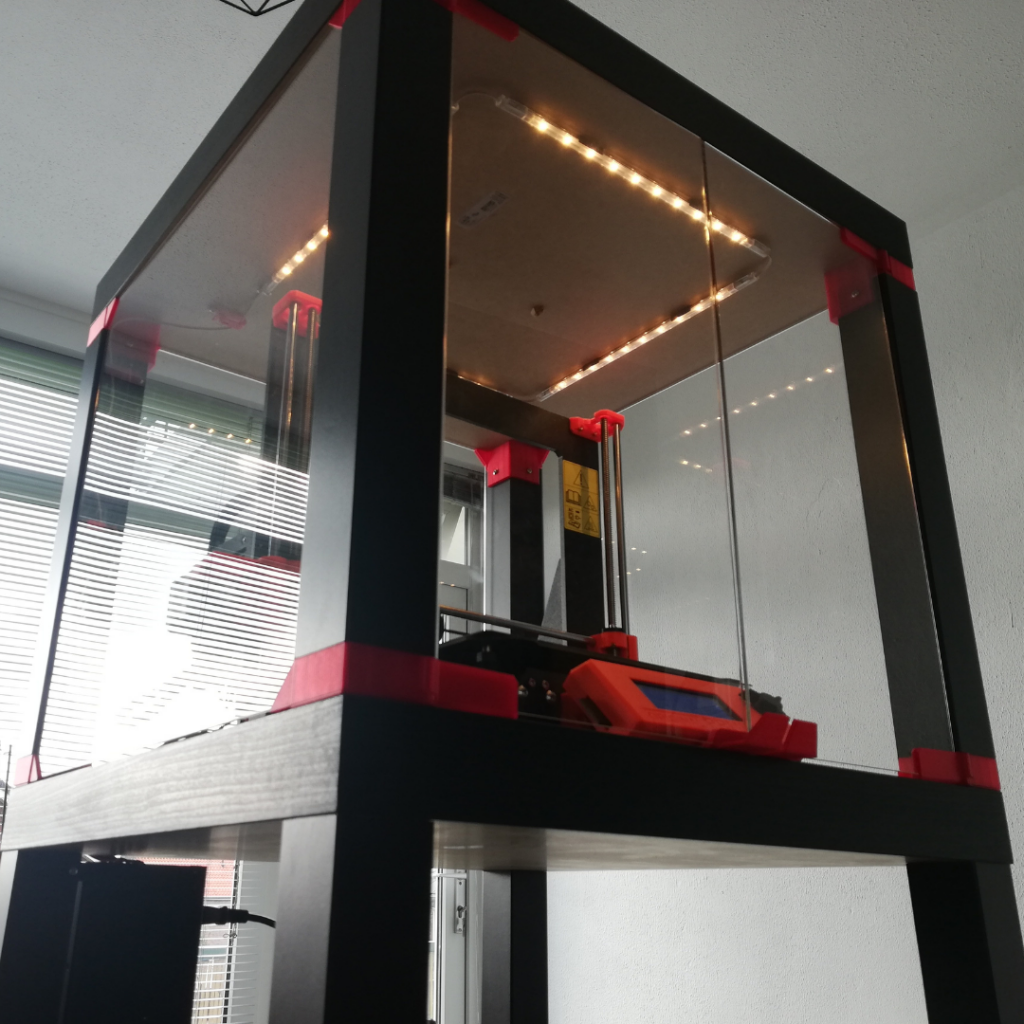
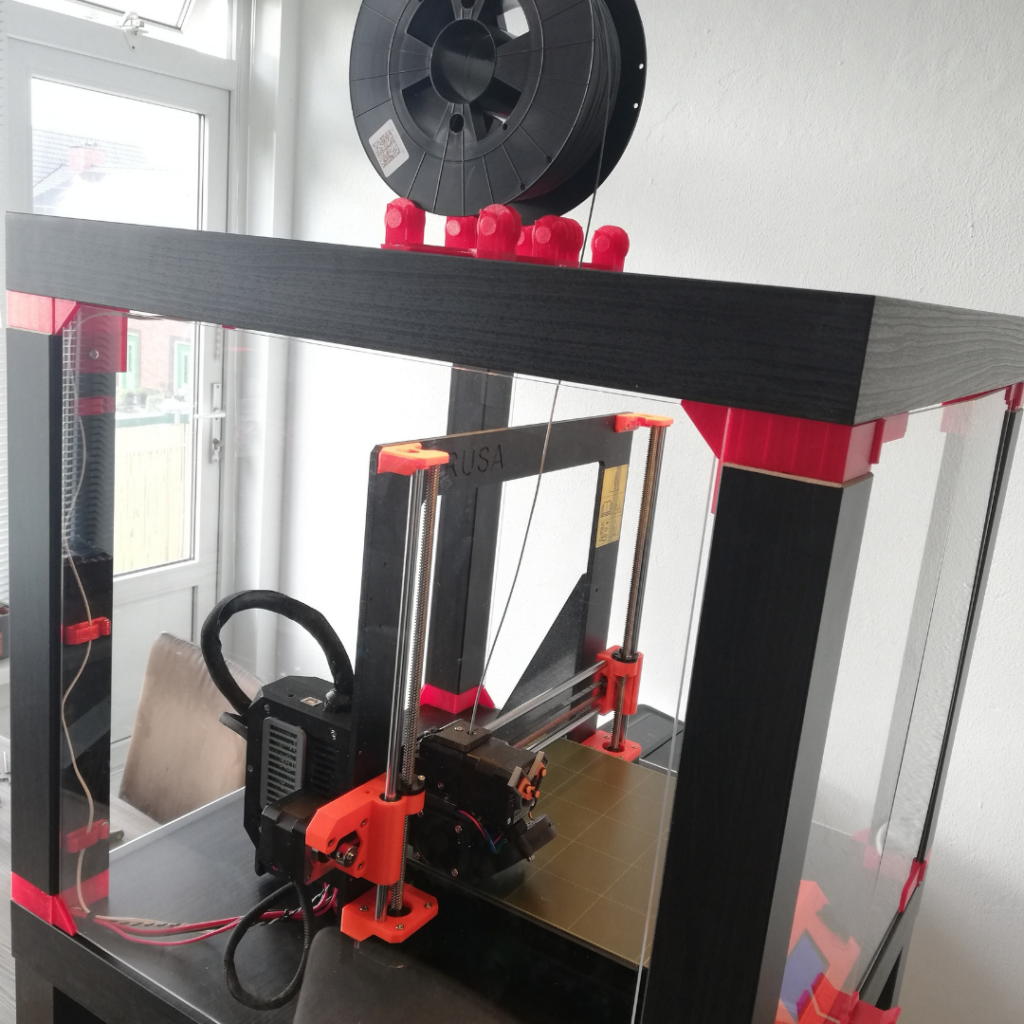
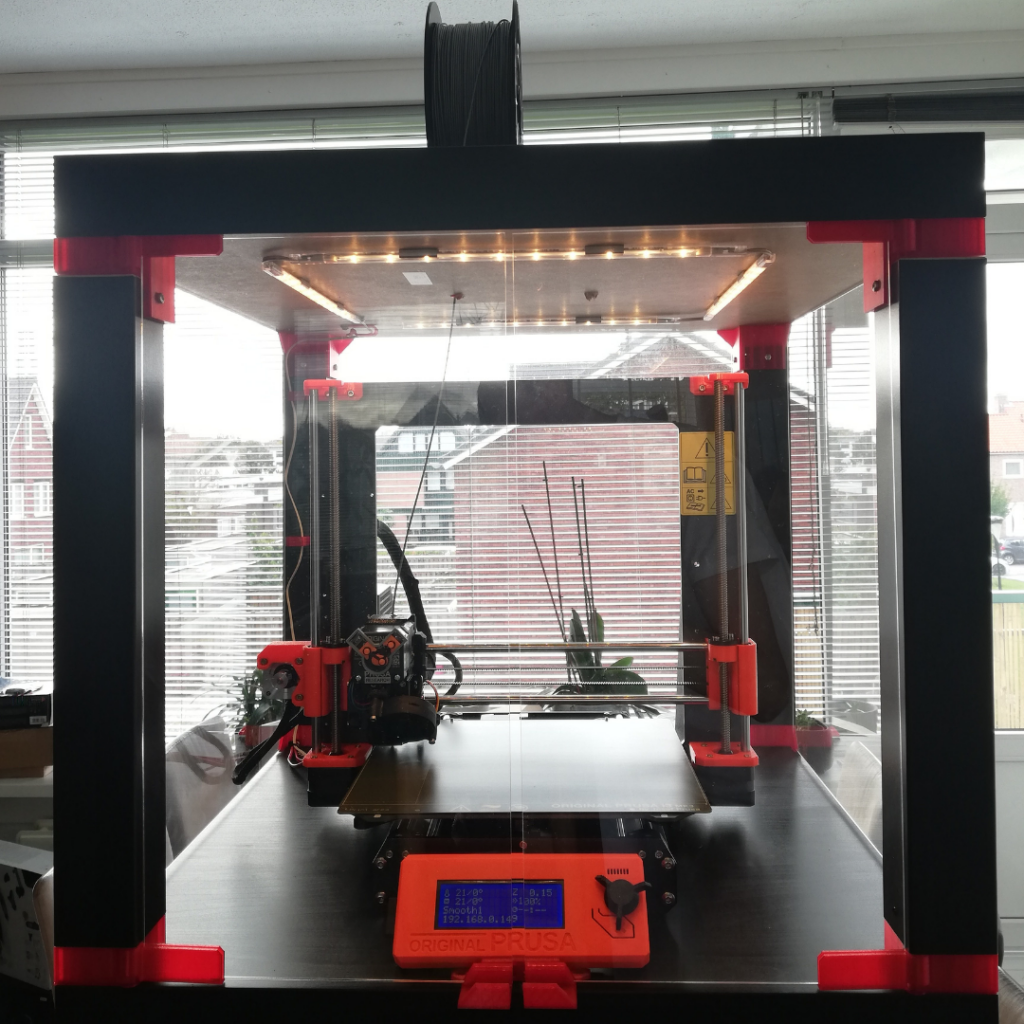
Rikus equipped his 3D printer with a practical enclosure by cleverly using IKEA Lack tables and acrylic. He connected the tables with specially designed spacers, which he printed himself on a 3D printer, and attached acrylic panels to create the enclosure. At the front, there are two convenient doors made from acrylic panels and hinges. He fitted LED lighting within the enclosure that switches on as soon as the printer starts. He also crafted a holder on top of the enclosure for the filament spools.
Rikus shared, “I wanted to create an enclosure for my 3D printer using two IKEA Lack tables and specially designed spacers, which I printed myself.”
Step-by-step guide
steps
-
Print
Print the necessary spacers using your 3D printer.
-
Secure
Secure the spacers both above and below the legs of the upper table, as well as on the surface of the lower table.
-
Place
Place the acrylic sheets into the holders of the spacers.
-
Install
Install the LED lighting at the top and connect it to the motherboard of your printer.
-
Cut
Cut the front panel in half and attach it to the enclosure with hinges to create doors.

Rikus’s Tips
“Working on this project was a lot of fun. Once you’ve got everything you need and have printed it out, it comes together quickly. This is not a difficult project. Most of your time will be spent printing all the necessary parts. It’s definitely suitable for newcomers to the 3D printing world.”
DIY-Awards
Discover more DIY-Awards