
Make your own plastic planter

Plants bring a room to life, and greenery is back in fashion for interiors after a few years out of favour. The planter or flowerpot is almost as important as the plant itself. You can spend hours reading interior design magazines and browsing home decor shops, but if you’re looking for something a little different, you can make a planter yourself. In this DIY blog, we explain how to make a planter or flowerpot from acrylic sheet in very original colours.
What do you need?
- acrylic sheets
- Fixxerss Plastic UV Glue
- Rubber gloves
- Block hook
- Slats and glue clamps
Are you going to do the cutting yourself? Then you’ll need the following items:
- Jigsaw (with a saw blade for plastics)
- Painting tape
- Wooden plank
- Glue clamps
- Sandpaper (200 grit or finer)
Use the masking tape to mark the saw line on the acrylic. If you want a straight cut, use a wooden slat as a guide, which you fix on the acrylic with glue clips. After sawing, you have to finish the edges. You can do this with sandpaper (200 grit or finer) or by flame polishing. In that case, you’ll need a propane burner. You can find more useful tips on sawing acrylic in our DIY blog.
Create an original plastic planter yourself
As soon as the acrylic sheets have been delivered to your home, you can get started. Below, we describe step by step what you have to do and the points you have to take into account. At the end of the step-by-step plan, you ’ll have an original, home-made planter.


Step 1: Smooth the edges of the acrylic sheets
After sawing, a rough surface is formed on the side of the sheet, this is called a sawing stroke. It is important to finish the sides neatly. If you have had the sheets cut to size by Plasticsheetsshop, the cut edges will have already been finished. Nevertheless, we recommend sanding the edges lightly. The sawing stroke can be sanded off with sandpaper of 200 grit or finer, or you make them super smooth by flame polishing. We explain these methods in our blog post on Polishing Acrylic Sheets. You should really read this because these finer details will make a big difference to the finished planter.
Step 2: Ensure that the acrylic glass is free of grease
The surfaces to be bonded must be free of grease so the next step is to clean the sheet. This is best done with anti static cleaner or alcohol, then wipe the parts dry with a lint-free microfibre cloth.
Step 3: Gluing the sides
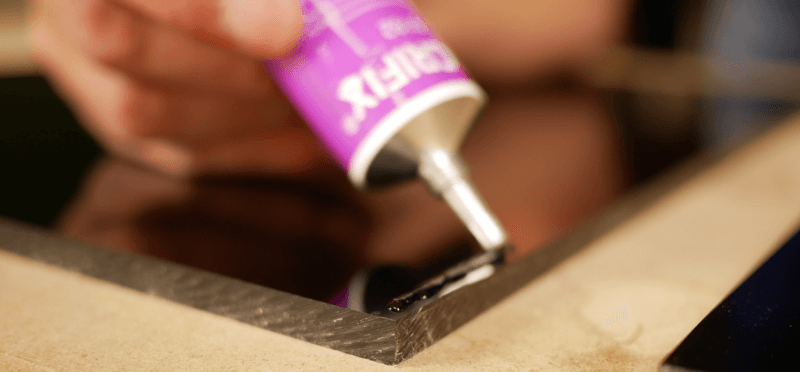
Before you start gluing the sides, we want to explain something about gluing acrylic sheets. Gluing acrylic is not actually a gluing process, but a kind of welding. The Acrifix adhesive dissolves the surface of the plexiglass, allowing it to merge into a single unit, just as when welding metal. The solvents in the glue are strong and harmful when inhaled, so the room in which you work should be well ventilated. It’s also essential to wear rubber gloves to prevent contact with the skin. A final point: the glue is very thin, so keep a cloth on hand to wipe away excess. As previously mentioned, Acrifix allows the surfaces of acrylic sheets to flow together, and that is why it is so important that the edges are neatly finished. The flatter and smoother the edge, the stronger the glued connection.
Make sure that you connect the right sheets together so that all edges fit together perfectly. Place the sheet which is intended for the front of the planter on the workbench and apply the glue along the inside edge.
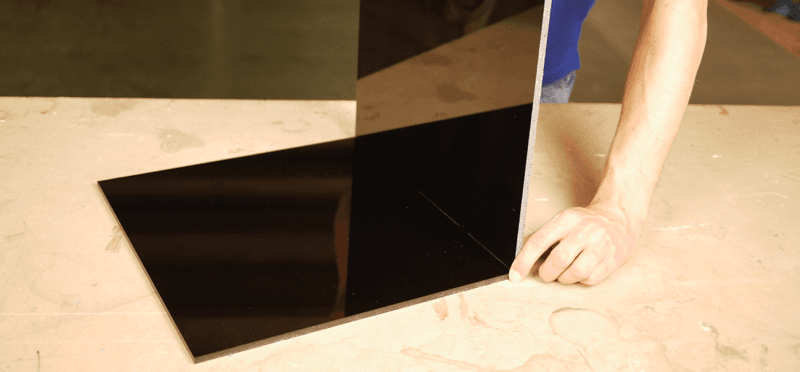
Then position a side sheet on it. We recommend the use of a square hook for a right angle connection. Fix the glued joint with slats and glue clamps and leave to harden for 20 minutes. The most convenient sequence for bonding is first, the front on one side and the back on one side. Then glue these two parts together, finally place the bottom on them. Wait 20 minutes and your planter is ready!
Design tips
We have a wide range of acrylic glass available in our webshop and you are free to decide the colour and type yourself. For larger plants, it’s important that the container has sufficient depth for the root system. Is your planter going to be used outside? If so, there’s a risk of rainwater remaining in the planter and causing the roots to rot. In this case, drill a few 3-millimetre holes in the base so that excess moisture can drain away.
Acrylic is more easily scratched than regular glass. For example, scratches can occur during cleaning if you do not use the right materials. Check out our tips and tricks to keep your acrylic sheet nice and clean for as long as possible.

