DIY centrepiece: an acrylic bowl

If you are planning a special dinner, you probably aren’t thinking about using acrylic as a table decoration. In our previous blog about acrylic table decoration, we showed why this material is very suitable for making your own centrepieces. In this blog, we show you how you can transform an acrylic sheet into a unique bowl.
What do you need?
- 3 mm thick acrylic sheet
- An oven and oven gloves
- A baking tray with baking paper
- An oven-proof bowl
- A bowl or dish that fits over the oven-proof bowl
- Scissors
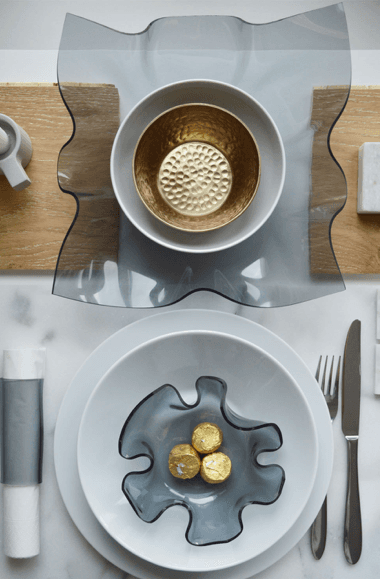
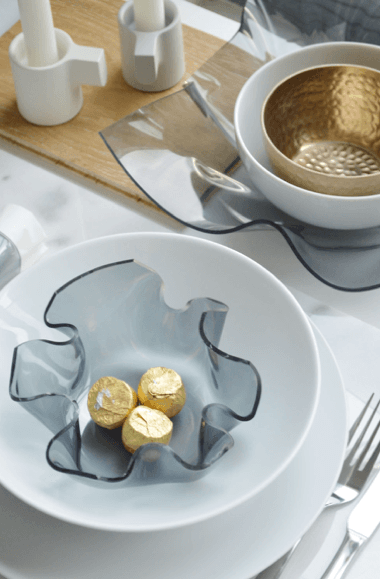
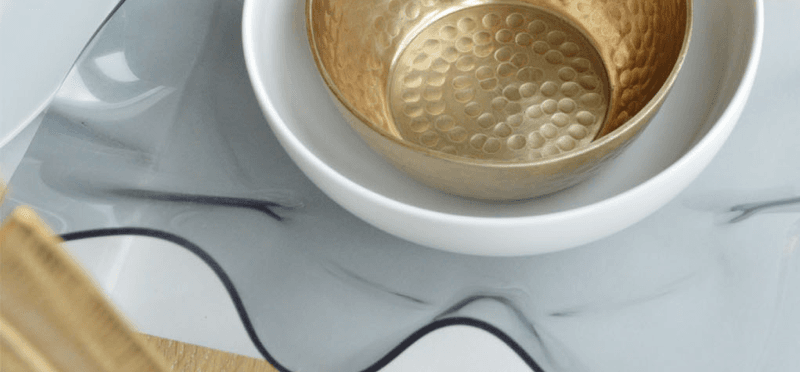
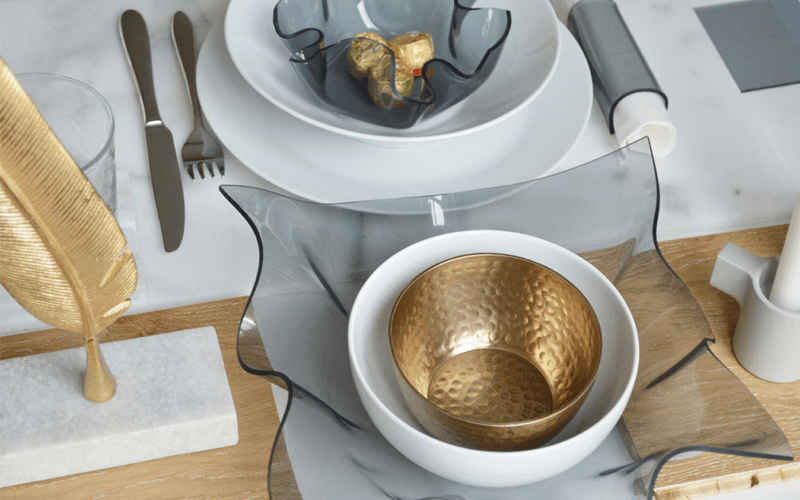
We use 3 mm thick acrylic sheets to create an acrylic dish. We have opted for grey tinted acrylic because this matches the table decoration from our previous blog article. This colour also goes well with warm wood tones and white crockery. Of course, you can choose another colour that suits your taste and style, such as copper or gold tones for an extra stylish look.
Follow the steps and surprise your dinner guests with this unique table decoration.
Step 1: Heat the acrylic
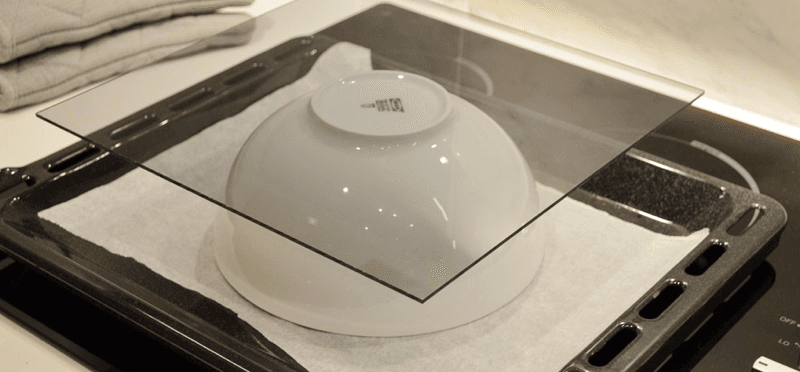
To be able to mould the acrylic sheet, it must first be heated. Preheat the oven to 200 degrees. While the oven is warming up, place an oven-proof bowl upside down on a baking sheet with baking paper. Place the acrylic sheet on the bowl, as in the photo below.
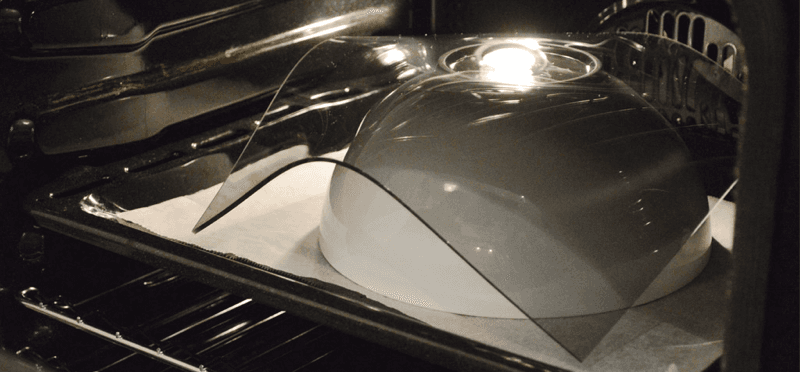
Once the oven has been preheated, place the baking sheet in the middle of the oven. Keep an eye on the acrylic during heating. You will see the plate deform after a few minutes: the corners of the sheet will drop. This is the sign that it is soft enough.
Step 2: Deform the acrylic sheet
Remove the acrylic sheet from the oven. Don’t forget your oven gloves! It is important to work quickly, otherwise, the acrylic will have cooled before you are finished. Use a larger bowl or bowl and push it evenly over the soft sheet. Hold the bowl in this position until the acrylic has cooled.
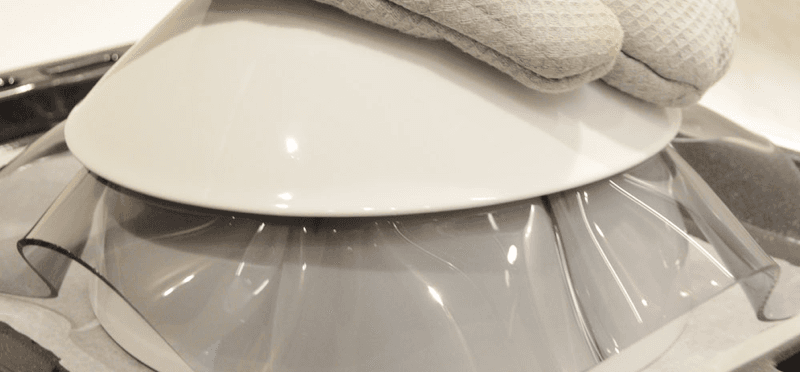
To create a deeper dish, you can place a smaller bowl in the warm acrylic sheet.
A tip for extra variation:
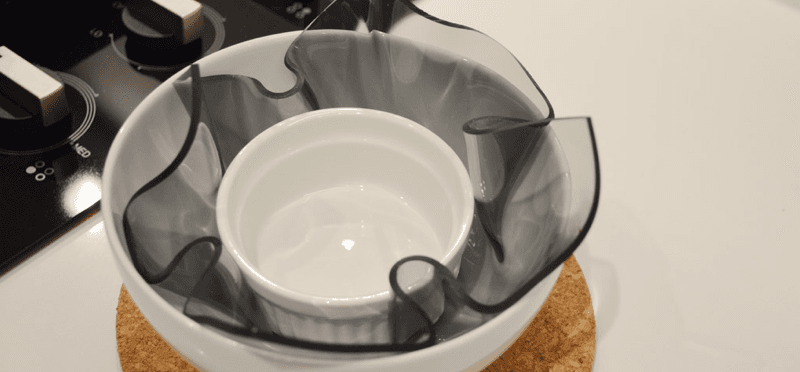
You make the bowl from a square sheet so that the corners protrude. If you don’t like this effect, you can trim the corners as long as the acrylic is still warm and soft.
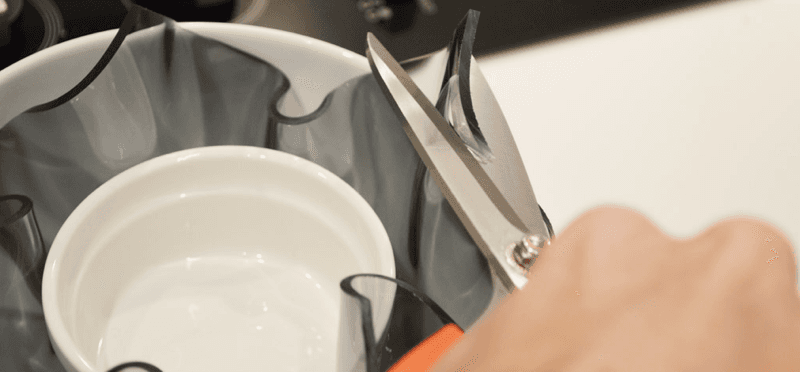
Has the acrylic cooled down before you have finished shaping and cutting? Then put it back in the oven.