Making a DIY lightbox isn’t difficult, and there are various ways to approach the project. A wooden lightbox is ideal for tracing cartoon characters, hand lettering, colouring pages or doodles. In this blog, we’ll show you how to make a good quality lightbox with a high, even light output using plywood and acrylic sheet.
To make a DIY lightbox, you’ll need:
The basics of making a custom lightbox
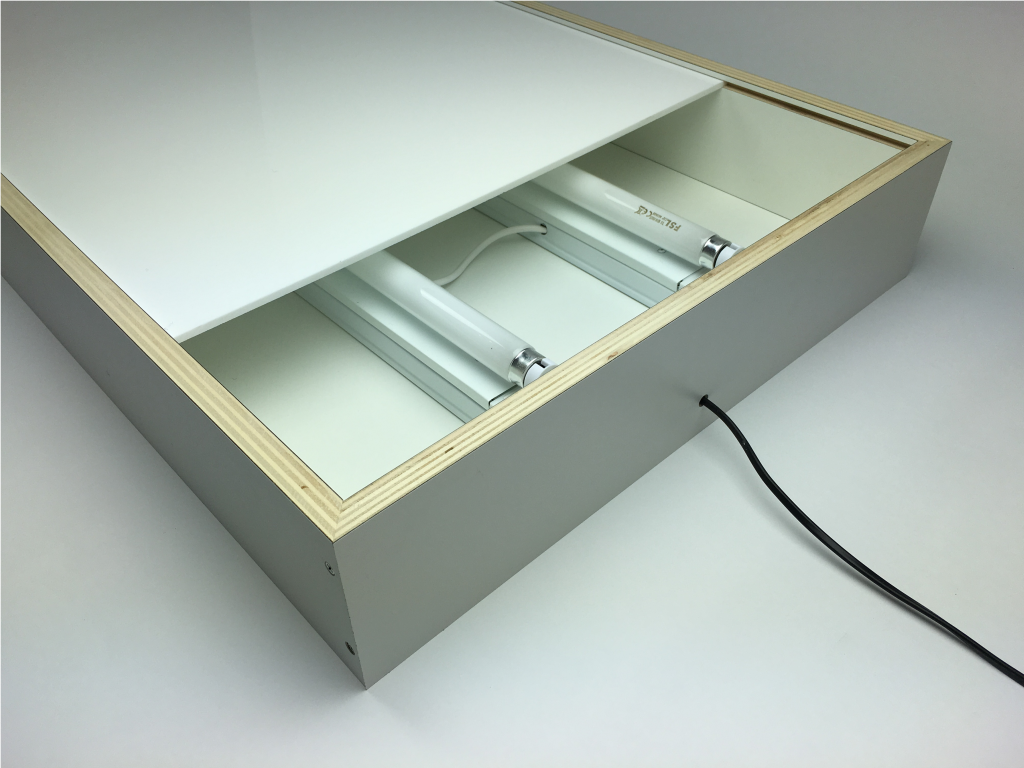
The basic material for our drawing lightbox is Okoume Multiplex, smooth, waterproof plywood with a white primer on both sides. To light it, we’re opting for TL fluorescent light fixtures, because they’re energy-efficient and have a relatively low heat development.
Step 1: make the frame of your LED lightbox
First, decide on the size of the lightbox so that you can determine how many lighting fixtures to use. If you make the lightbox about 20 centimetres deep, the light will diffuse more evenly over the light pad. We’re using TL fluorescent light fixtures for lighting, they’re energy-efficient and don’t create much heat.
Step 2: mill grooves in the side walls
Cut grooves in three side walls into which you can slide the acrylic sheet. Make the groove 5 mm deep and 5 to 8 mm away from the top edge. Use a router to cut a groove in the two long sides and one short side of the lightbox. The other side will be slightly lower than the other side walls. If you keep it 8 to 10 mm lower, you can slide in the plastic sheet from this side.
Step 3: assemble your tracing lightbox
Nail the side walls together with a single nail, so you can still make adjustments to the walls if you place them on the rear wall. Lay the side wall construction upside down on a flat surface (table or workbench) and place the back wall on top. Now you can align the lightbox properly so that it’s nice and square.
Pre-drill the holes with which the side walls will be attached to the rear wall, one screw every 10 centimetres is enough. The pilot bore diameter is 1 mm smaller than the screw diameter. Countersink the holes here using a drill that has the same diameter as the screw head. Then screw the side walls to the rear wall. Screw the side walls together in the same way, 2 to 3 screws in each end will be adequate. Don’t forget to remove the nails!
Step 4: install the lighting of your acrylic lightbox
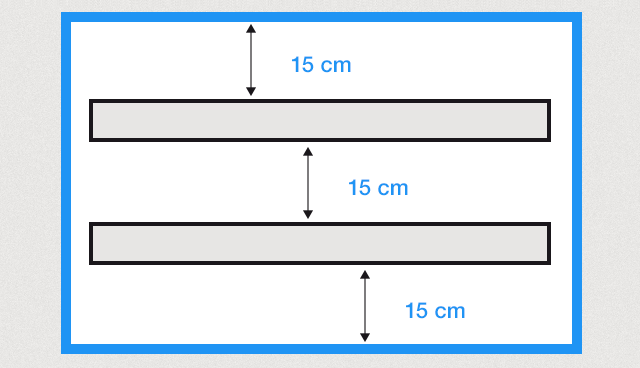
The rule of thumb is to place the lighting fixtures 15 cm from each other and position them 15 cm from the wall.
Step 5: Insert the acrylic sheet in your lightbox
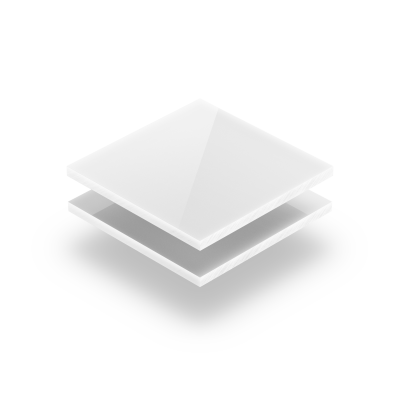
To make your DIY lightbox, use opal white acrylic sheet with a minimum thickness of 4 mm. Is one of your height or width measurements more than 60 cm? Then choose a thicker sheet. We recommend selecting the sheet thickness 1 mm thicker for every 20 cm larger. So with a lightbox measuring 60 cm, choose 5 mm thick acrylic sheet, and for an 80 cm lightbox, opt for 6 mm thickness.
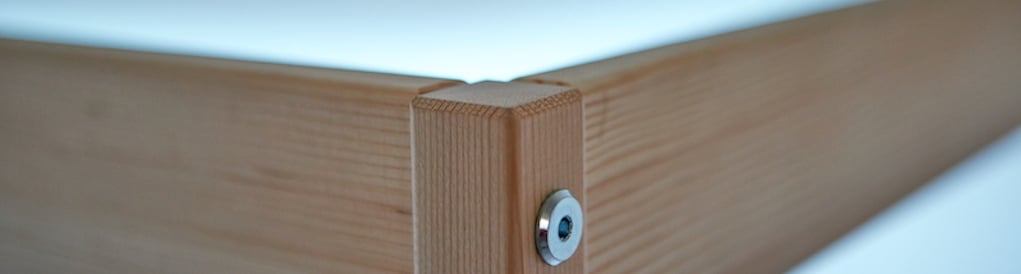
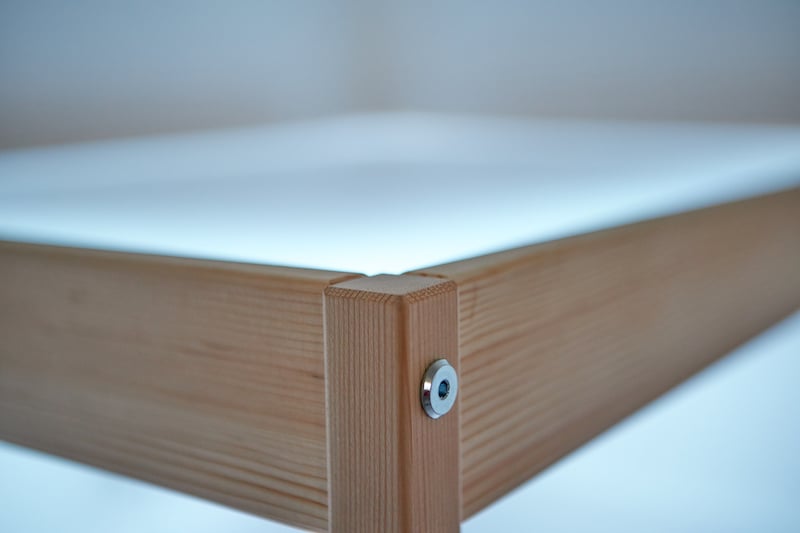
From the ‘low’ side, slide the acrylic sheet into the groove. The groove has precisely the same depth as the thickness of the acrylic; this prevents any vibrations and resonance of the acrylic working surface. You can still fix the worktop more securely with the help of a screw. To do this, you drill a small hole (3 mm) in the side of the acrylic sheet.
With the help of a larger drill (5 mm), you can countersink the drill hole neatly. Then you screw a countersunk screw through the acrylic sheet in the ‘low’ side of your lightbox. Your custom lightbox is now ready to use!
Tip: would you rather make a lightbox for children? Take a look at our blog “Making a light table: IKEA hack“.
Make your own LED lightbox
Are you planning to make your own DIY lightbox? Order your opal white acrylic sheet directly in our webshop, and we will cut the sheet to size for you in any shape you like. If you have any questions about this blog or our products, please don’t hesitate to contact us.
-
 White opal cast (GS) acrylic sheet 4 mm£ 57.95 excl. VAT
 Sustainable choice
-
White opal cast (GS) acrylic sheet 5 mm£ 69.95 excl. VAT
Sustainable choice
-
White opal cast (GS) acrylic sheet 6 mm£ 82.95 excl. VAT
Sustainable choice
-
White opal cast (GS) acrylic sheet 8 mm£ 109.95 excl. VAT
Sustainable choice